One of the most pivotal scenes in the story is currently in production. This is when Marcus first visits the Garden of Light and has an encounter with his Angel/Mom. Below is a screengrab of the setting, an initial animation study for the scene and my original video reference for the scene.

Classroom Scene - Lighting and Detail
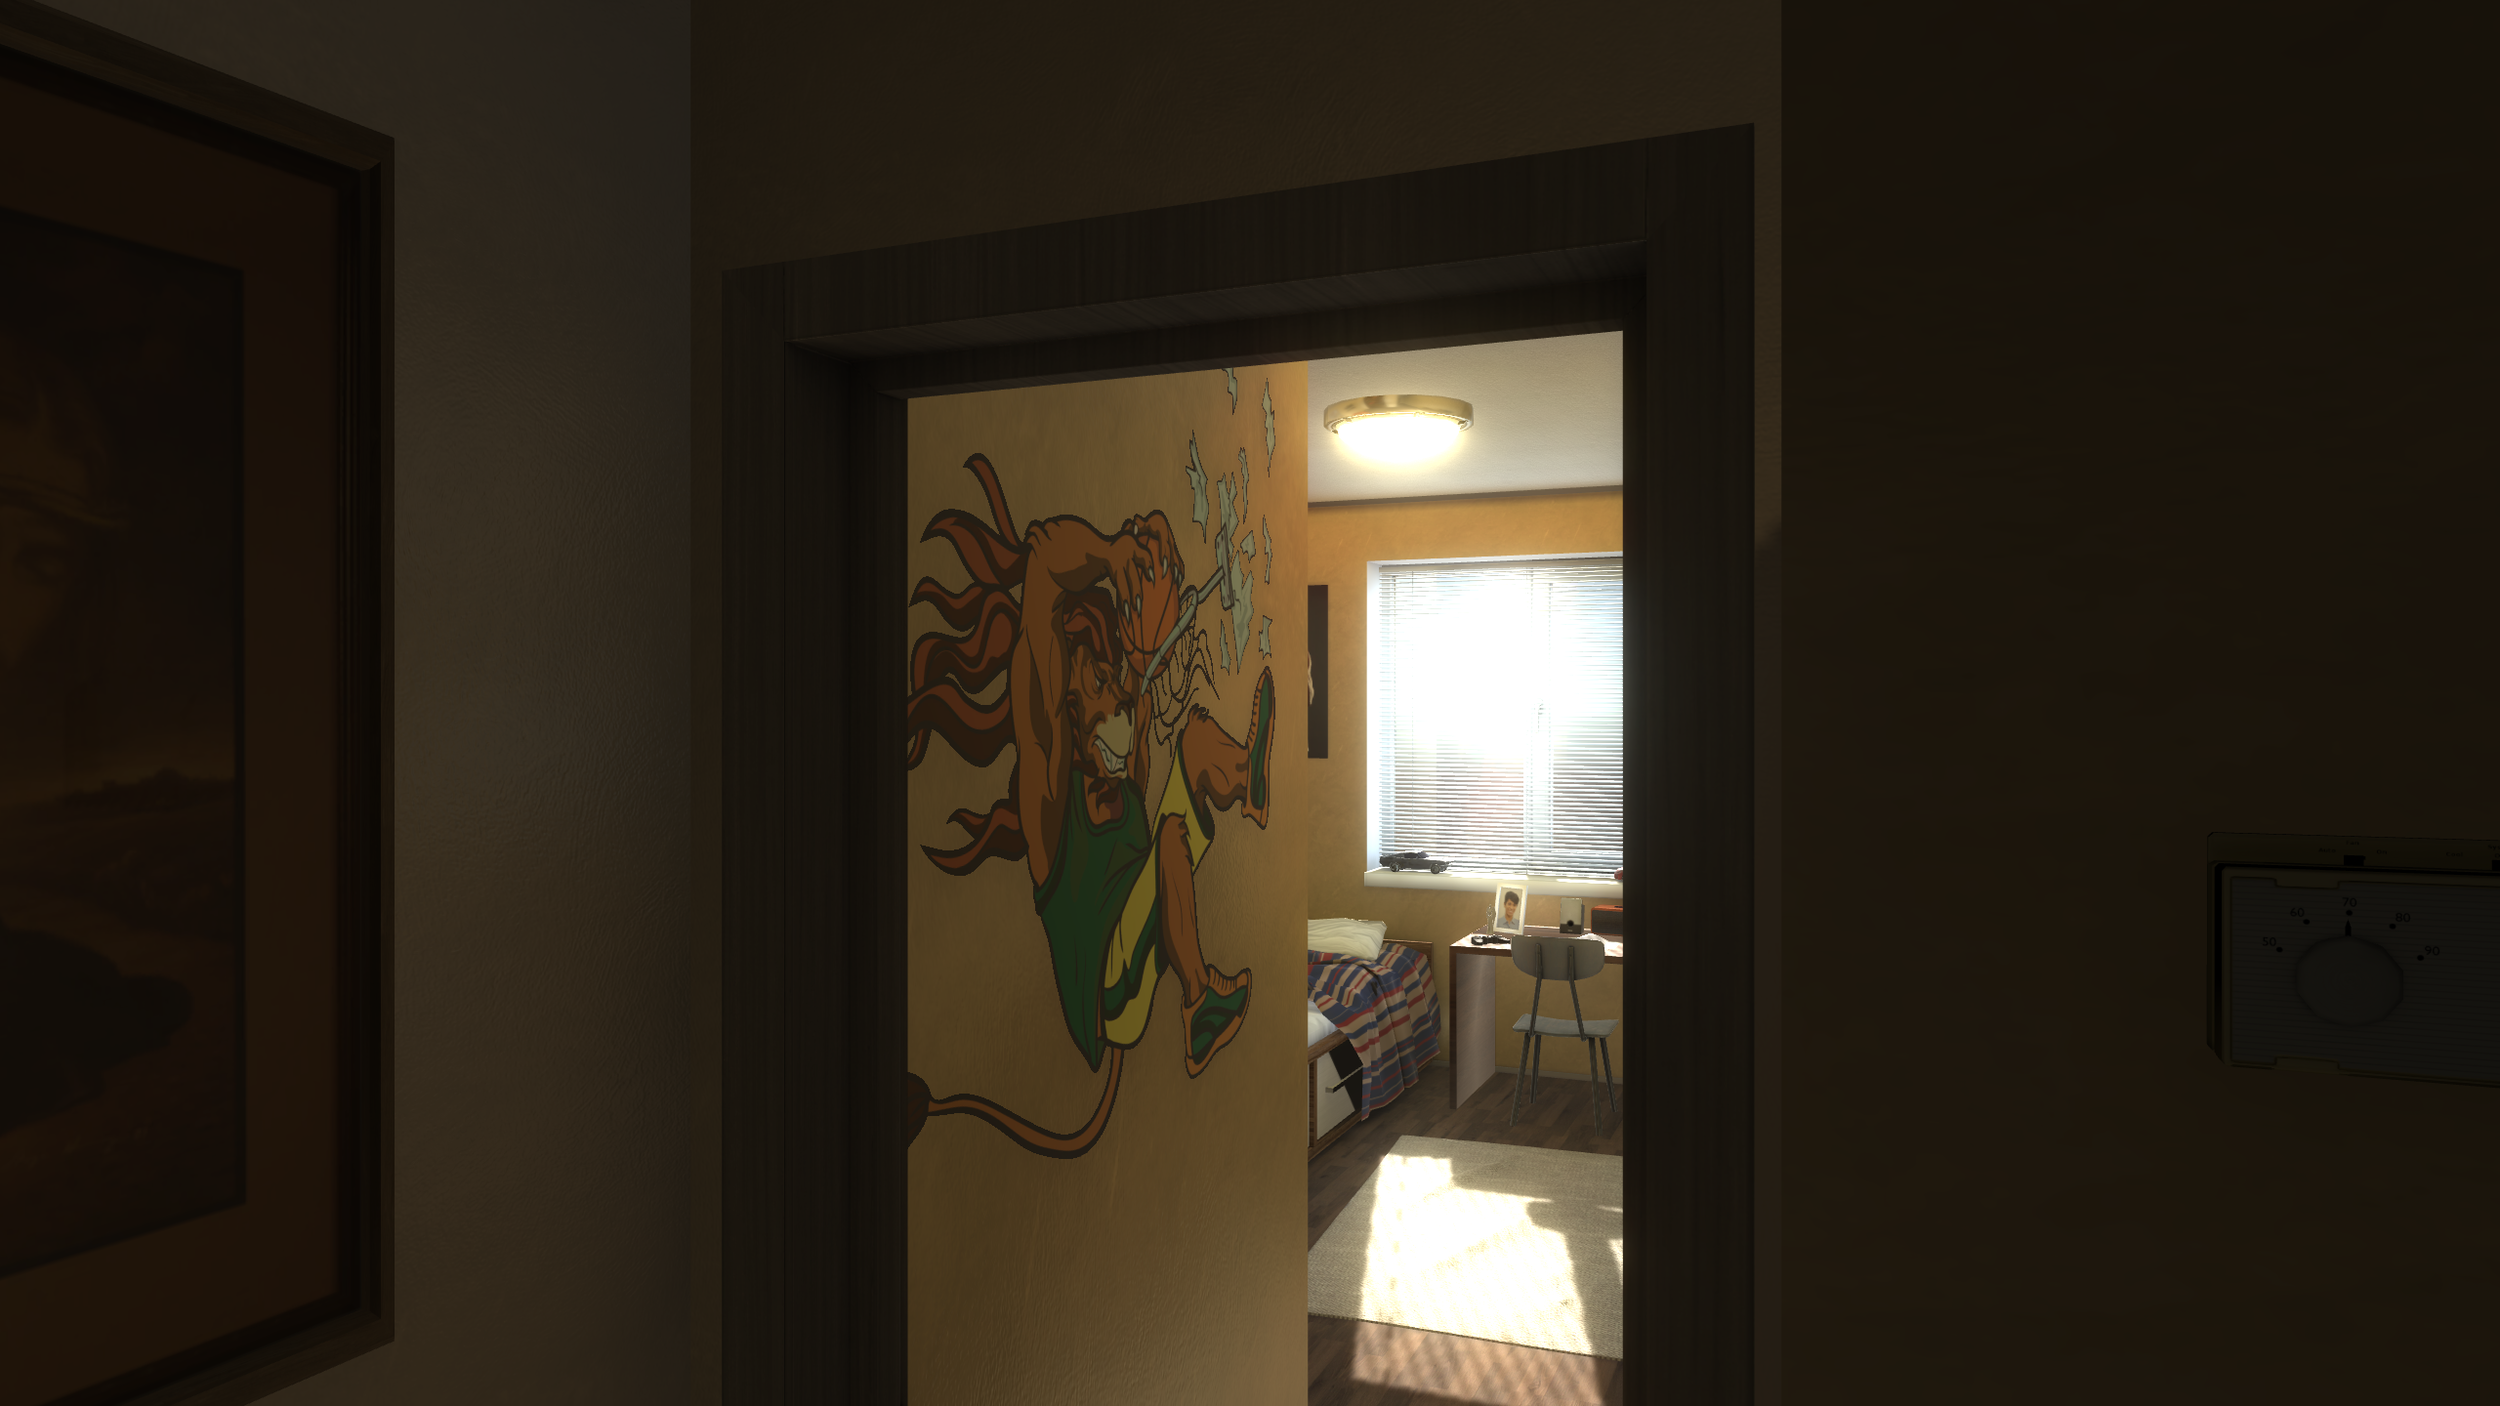
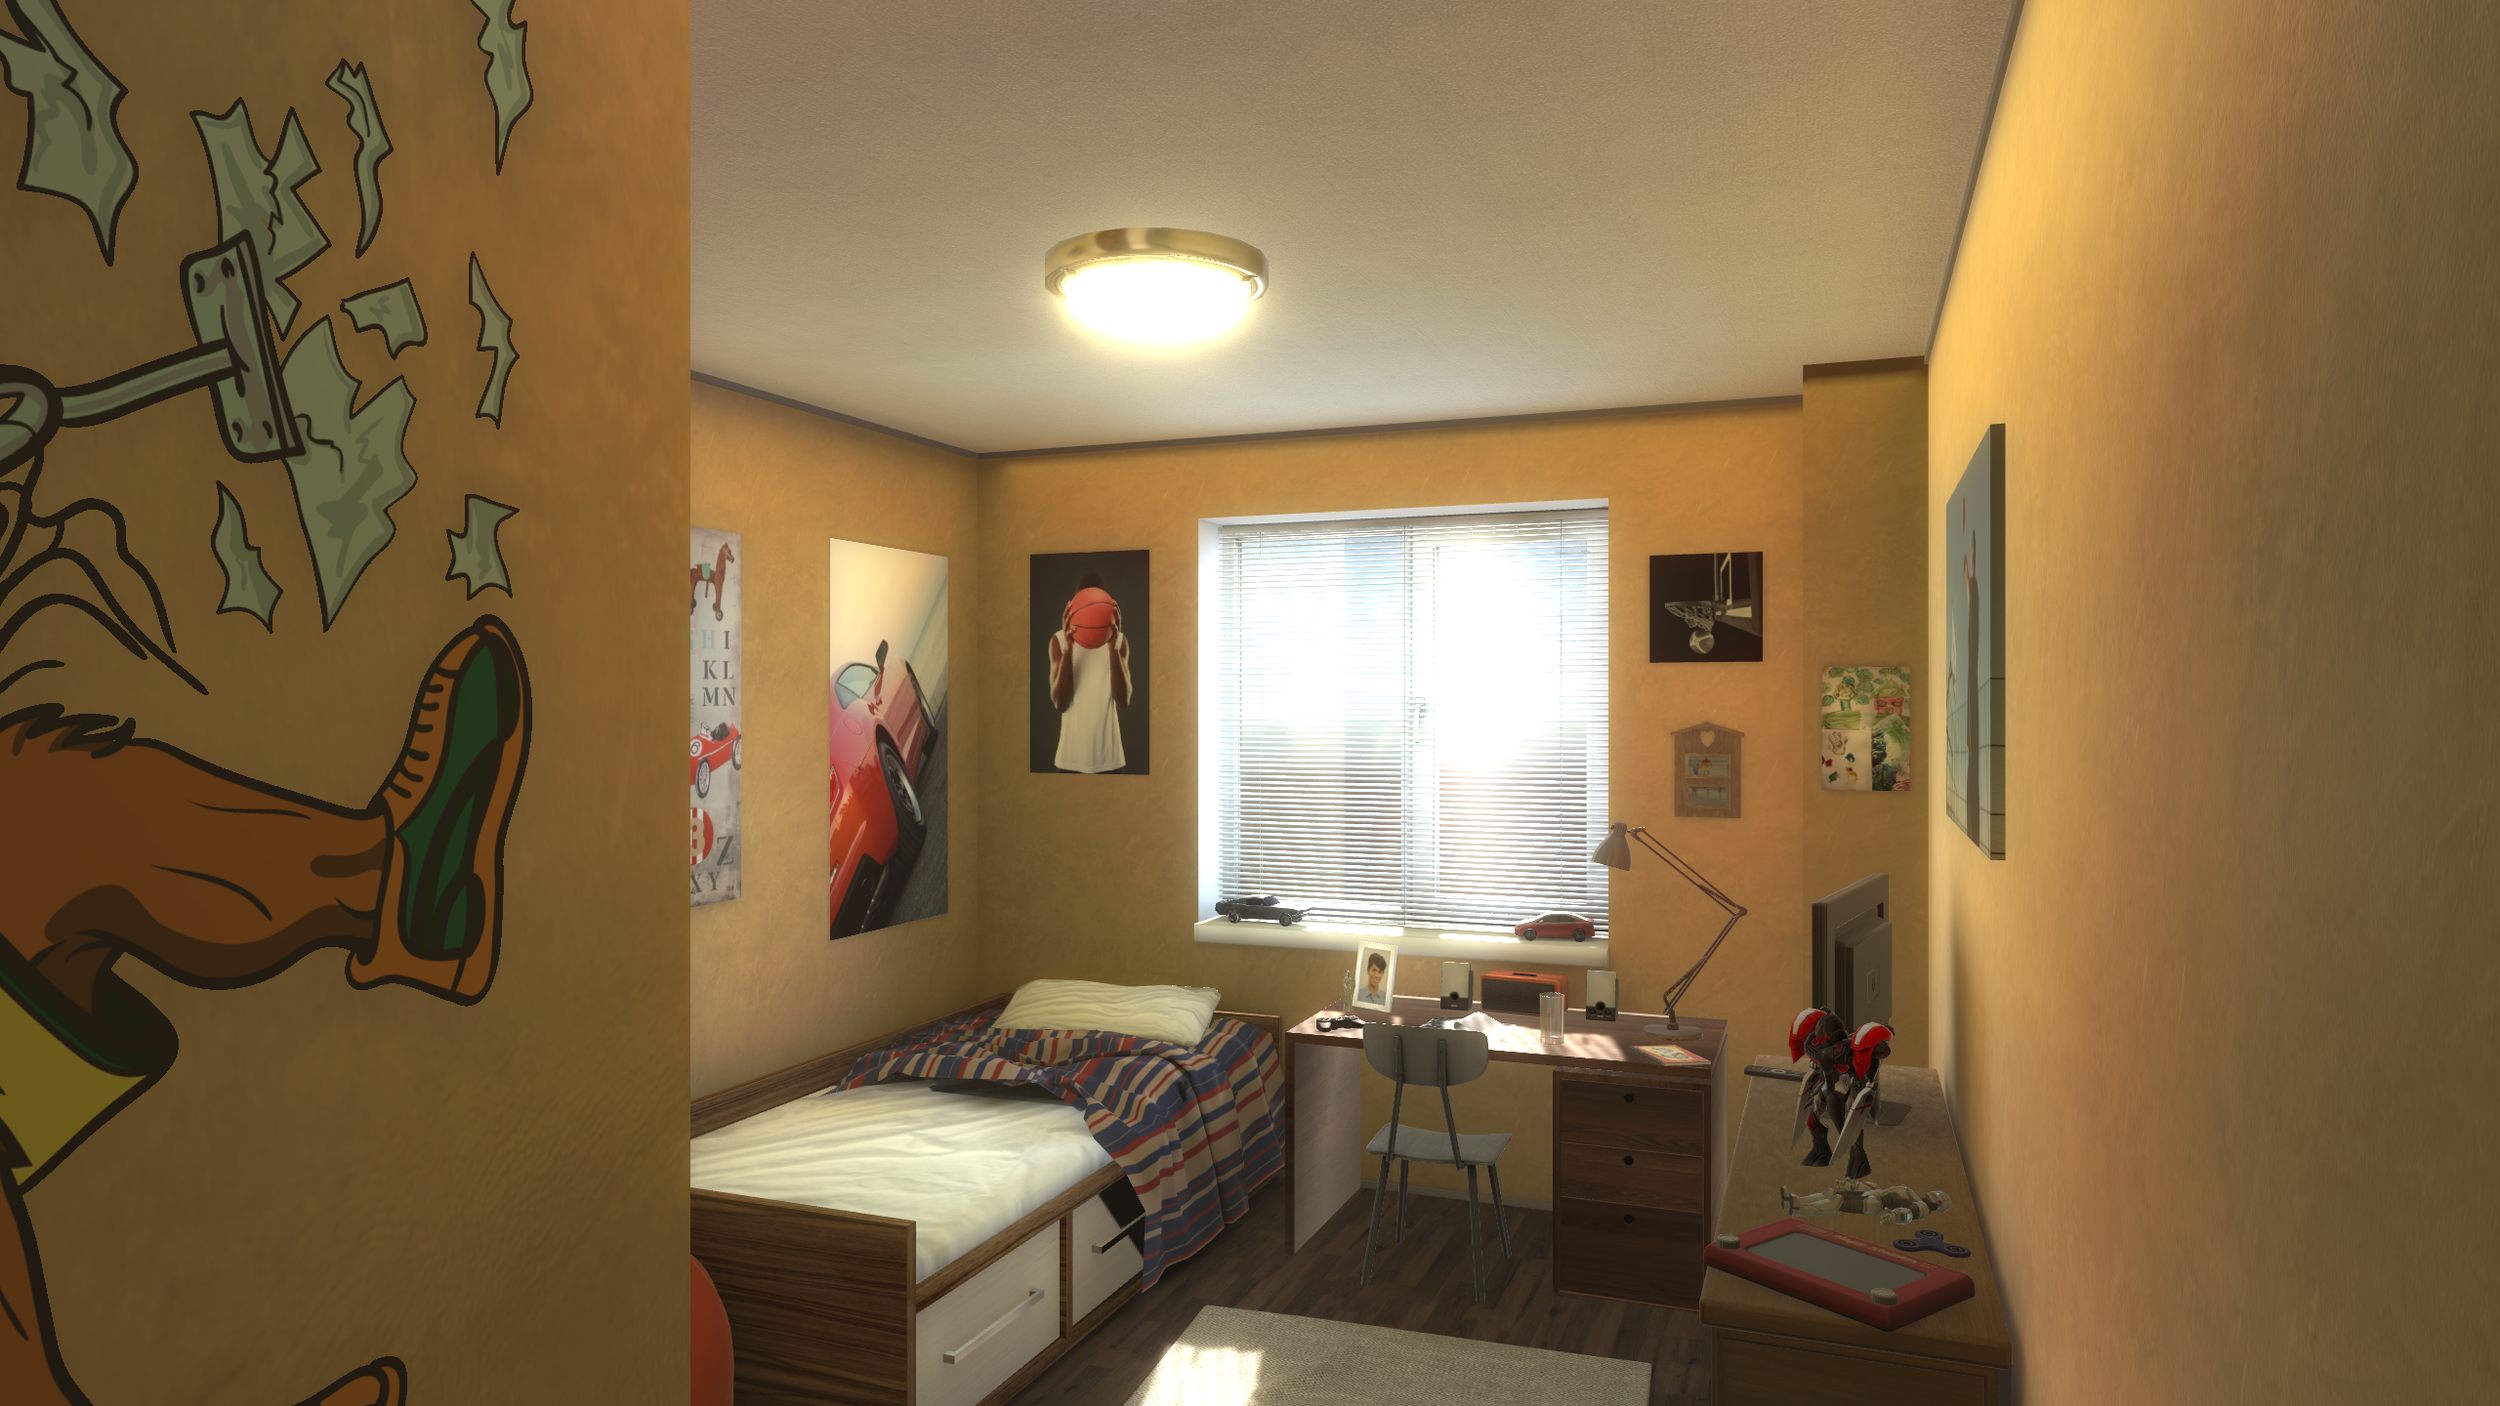
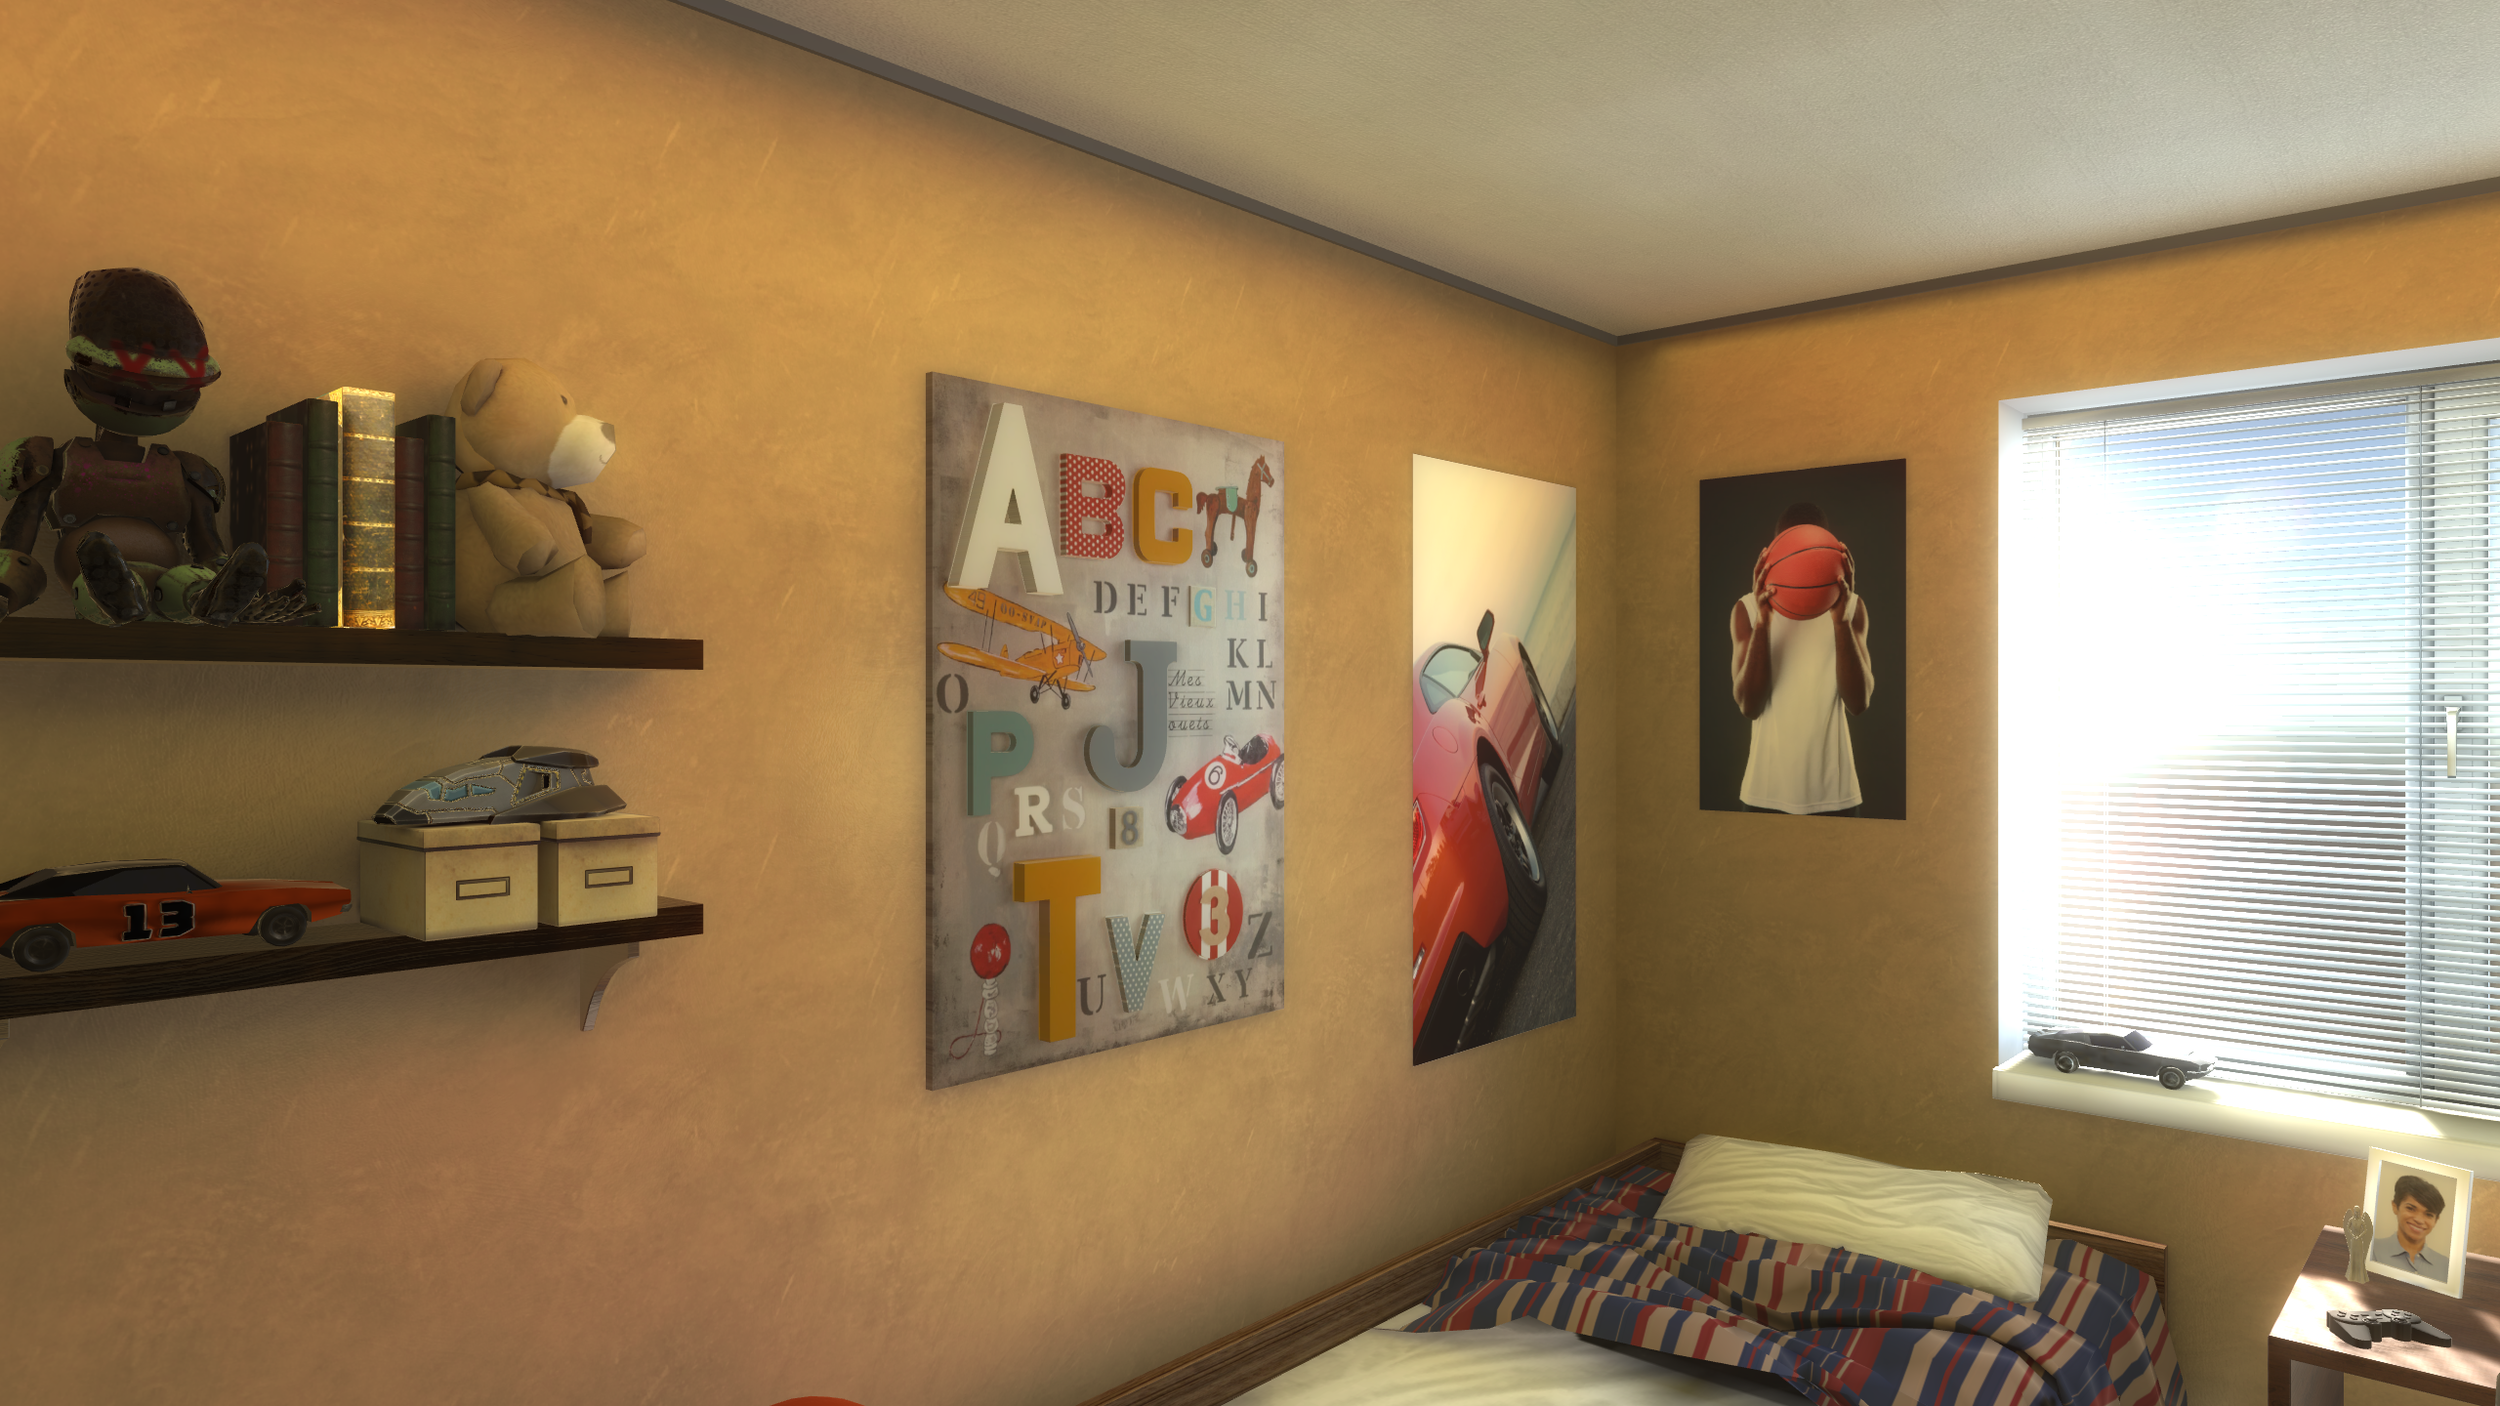
After finishing up the Apartment setting, I completed work on the Classroom setting. I finally got all of the character animations in place, but more importantly I completed the lighting and added details. Now that I have a sense of the look and feel that I want to carry throughout the piece, I added the same warm lighting to the classroom scene. Also, I adjusted many of the materials in the scene to get rid of the flat, cartoonish look. I think it's a 100x better now!


The Apartment
So, I finally finished building out the Kitchen and Marcus' bedroom and combined them into one setting. I'm really pleased with how well they turned out. In the process of working on these environments. I learned a lot more about Unity's lighting system and found some key plug-ins to assist with making the light soft and bloom. Now, I have the ability to make daylight scenes look as photo-real as possible. It's been a really fun week!

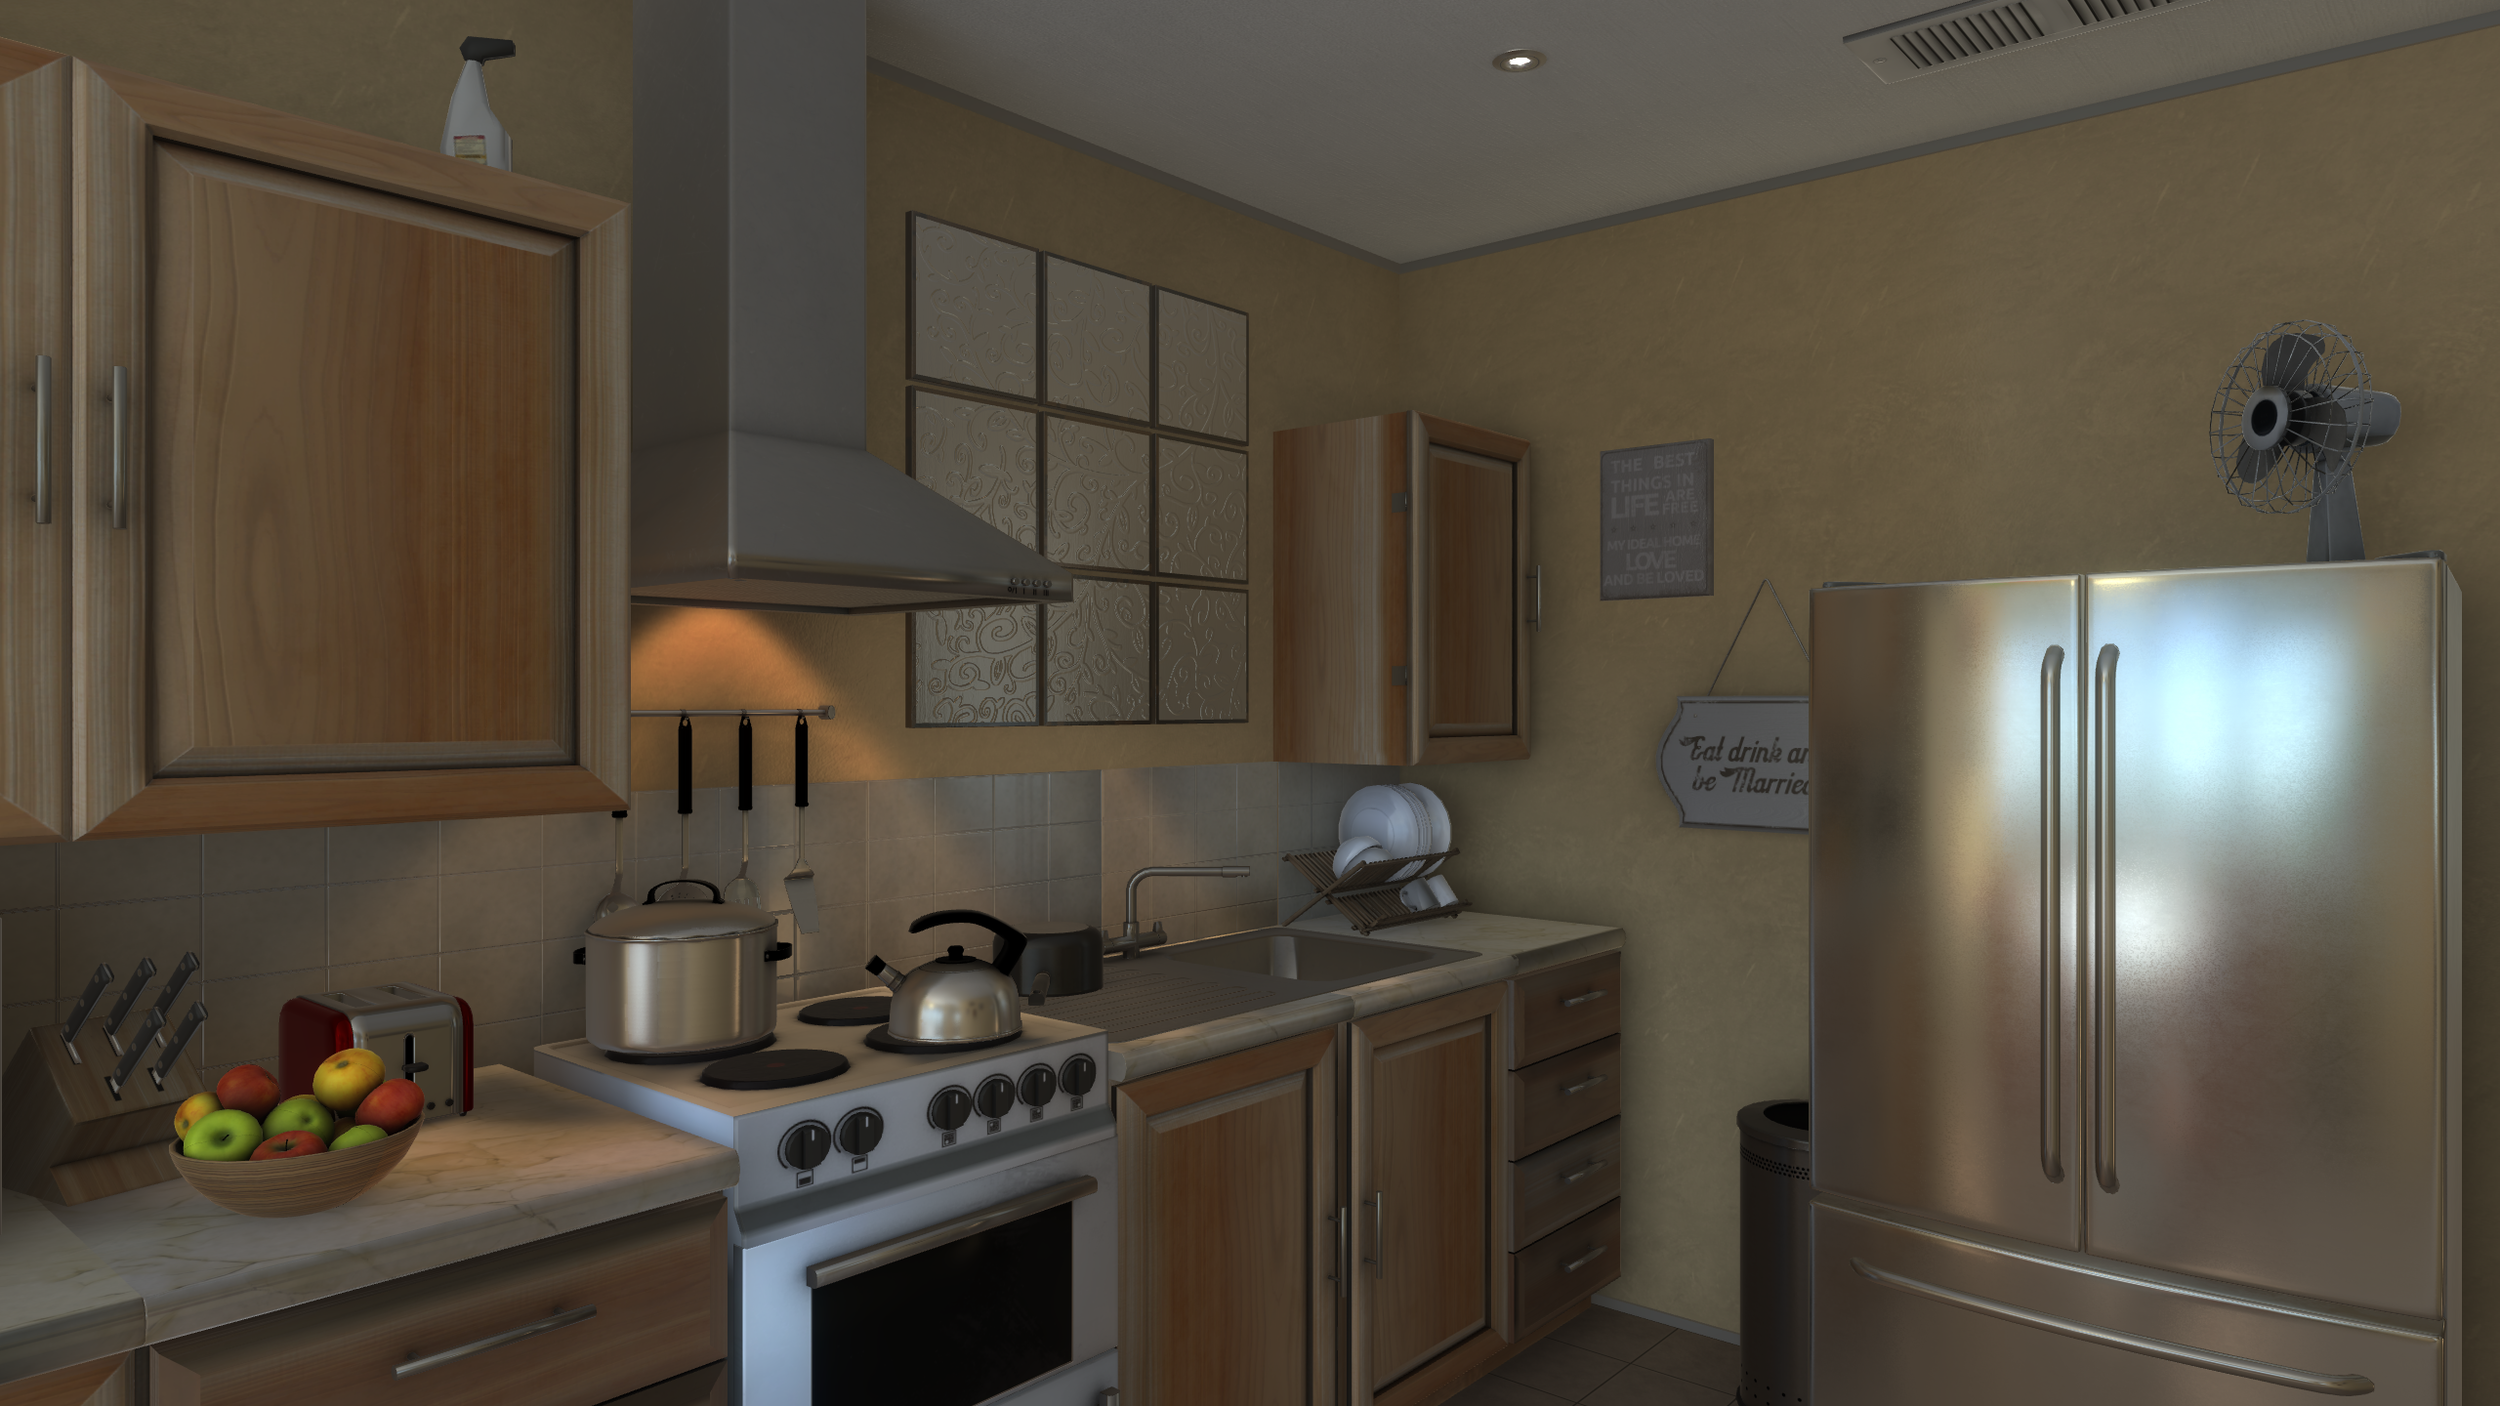
Kitchen Scene
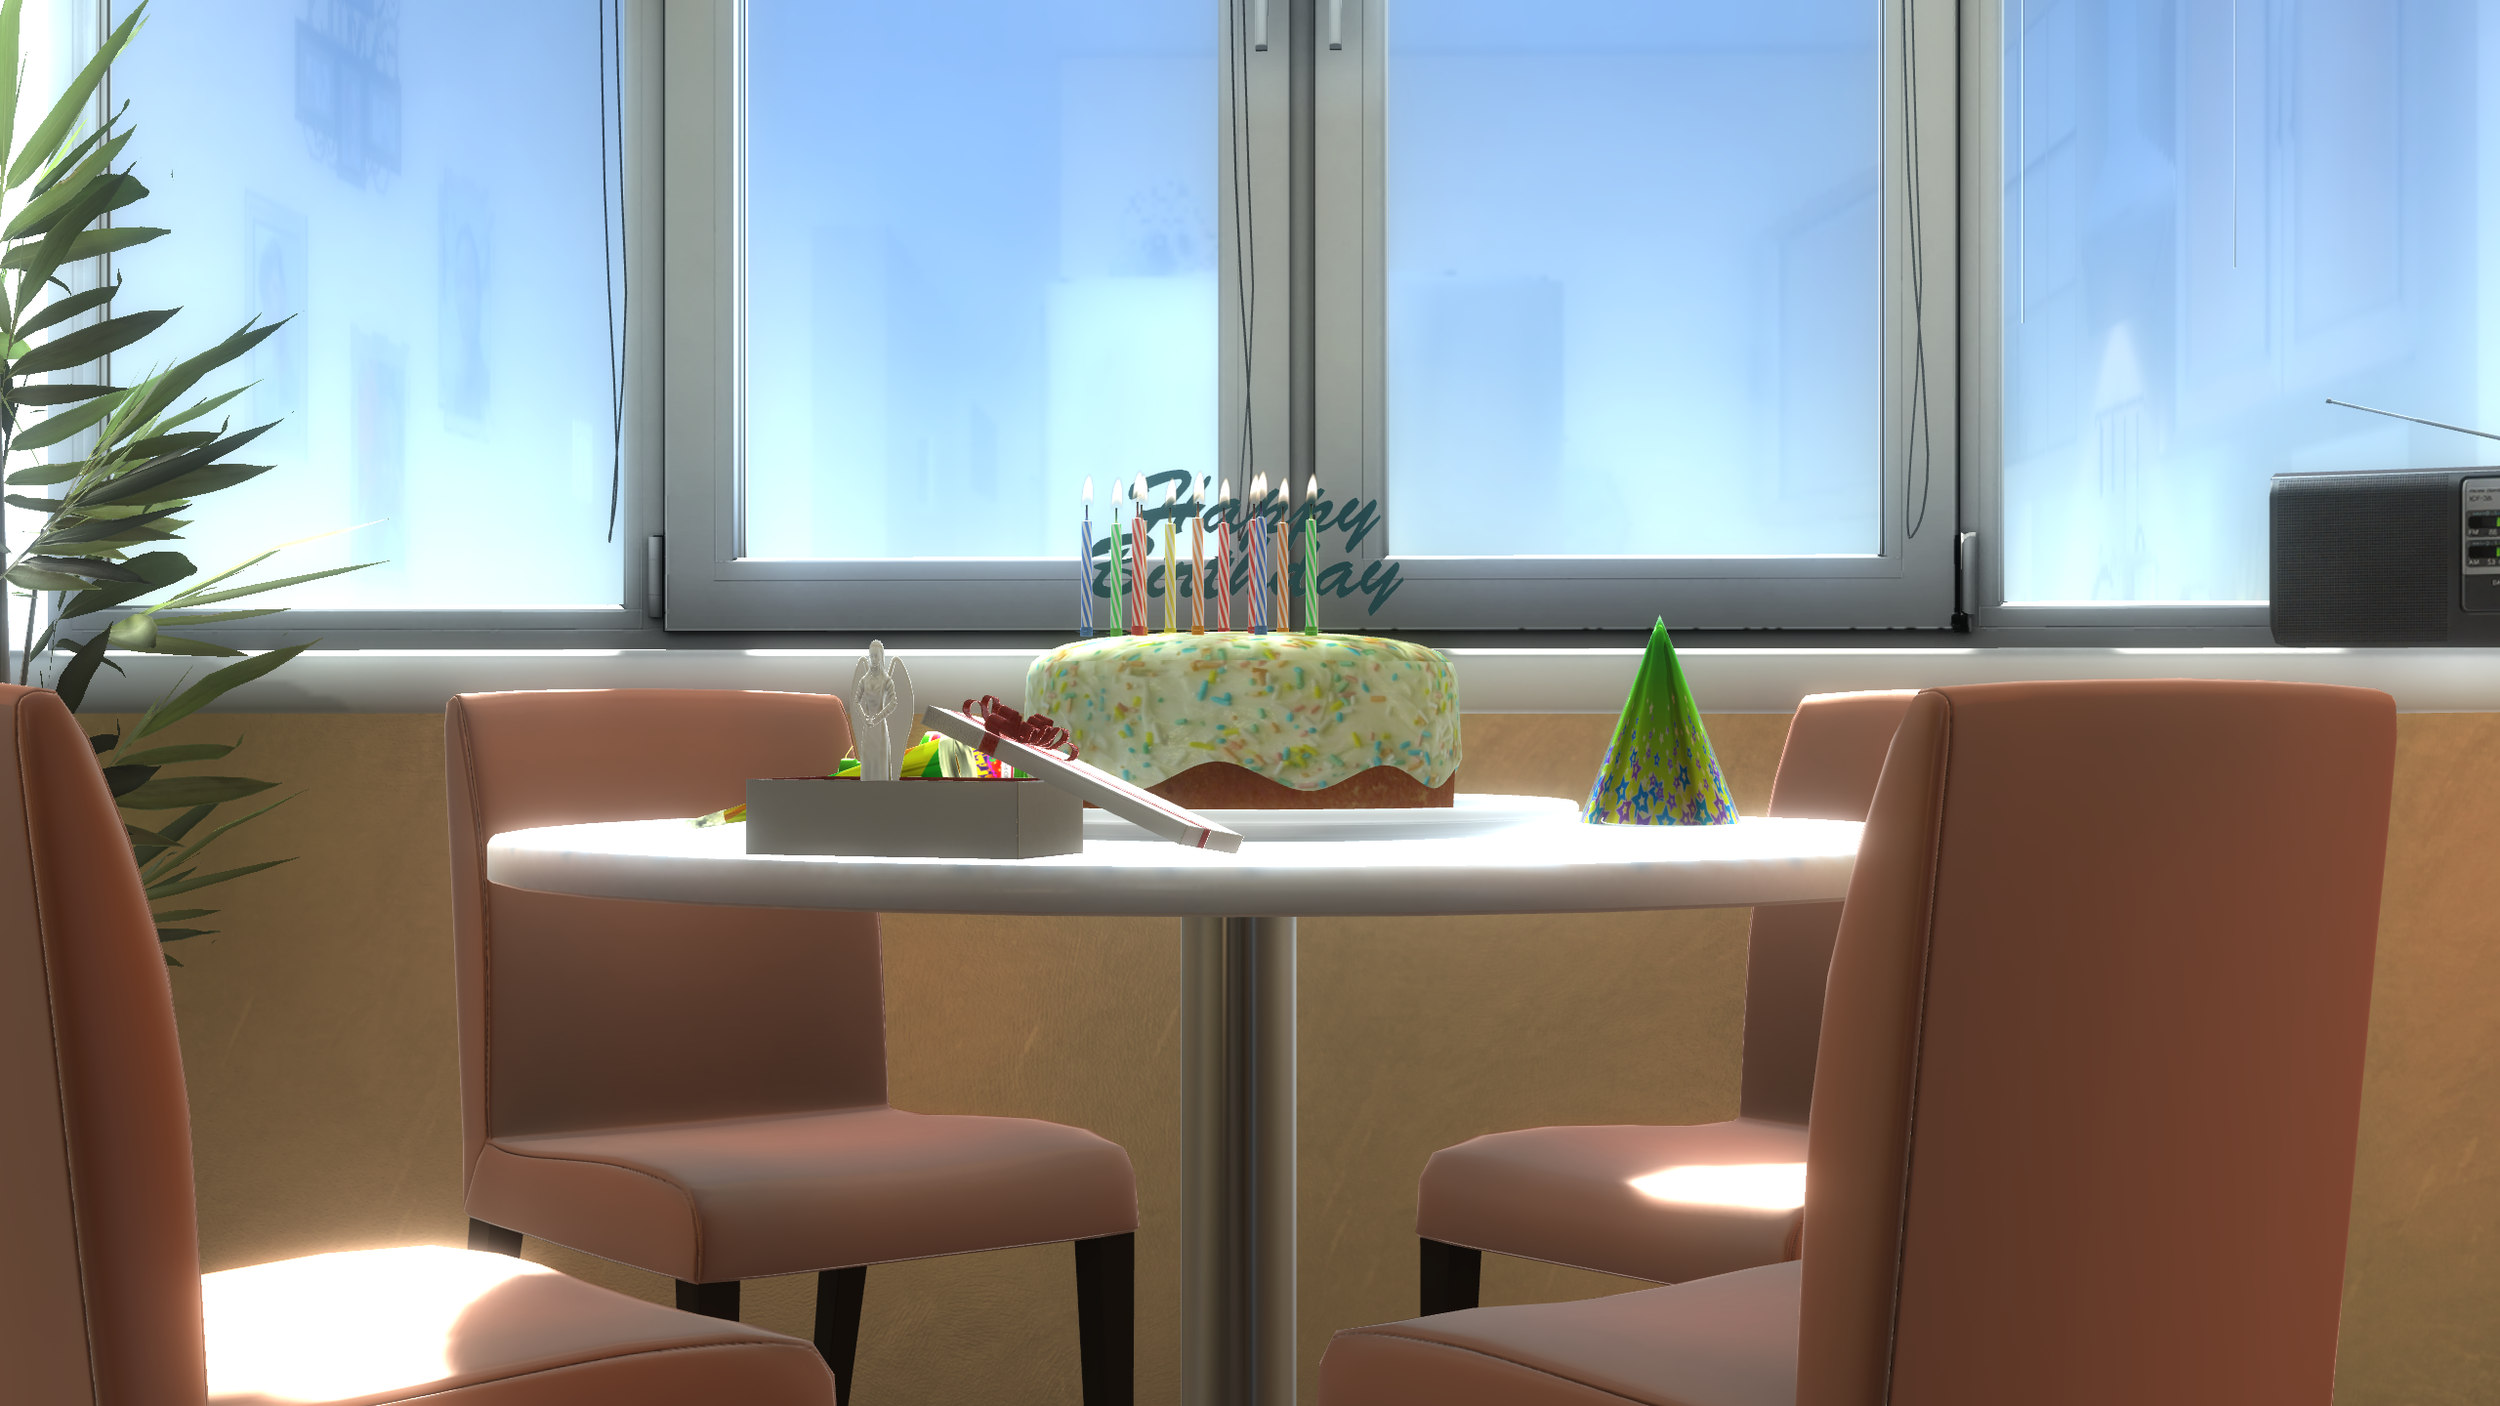
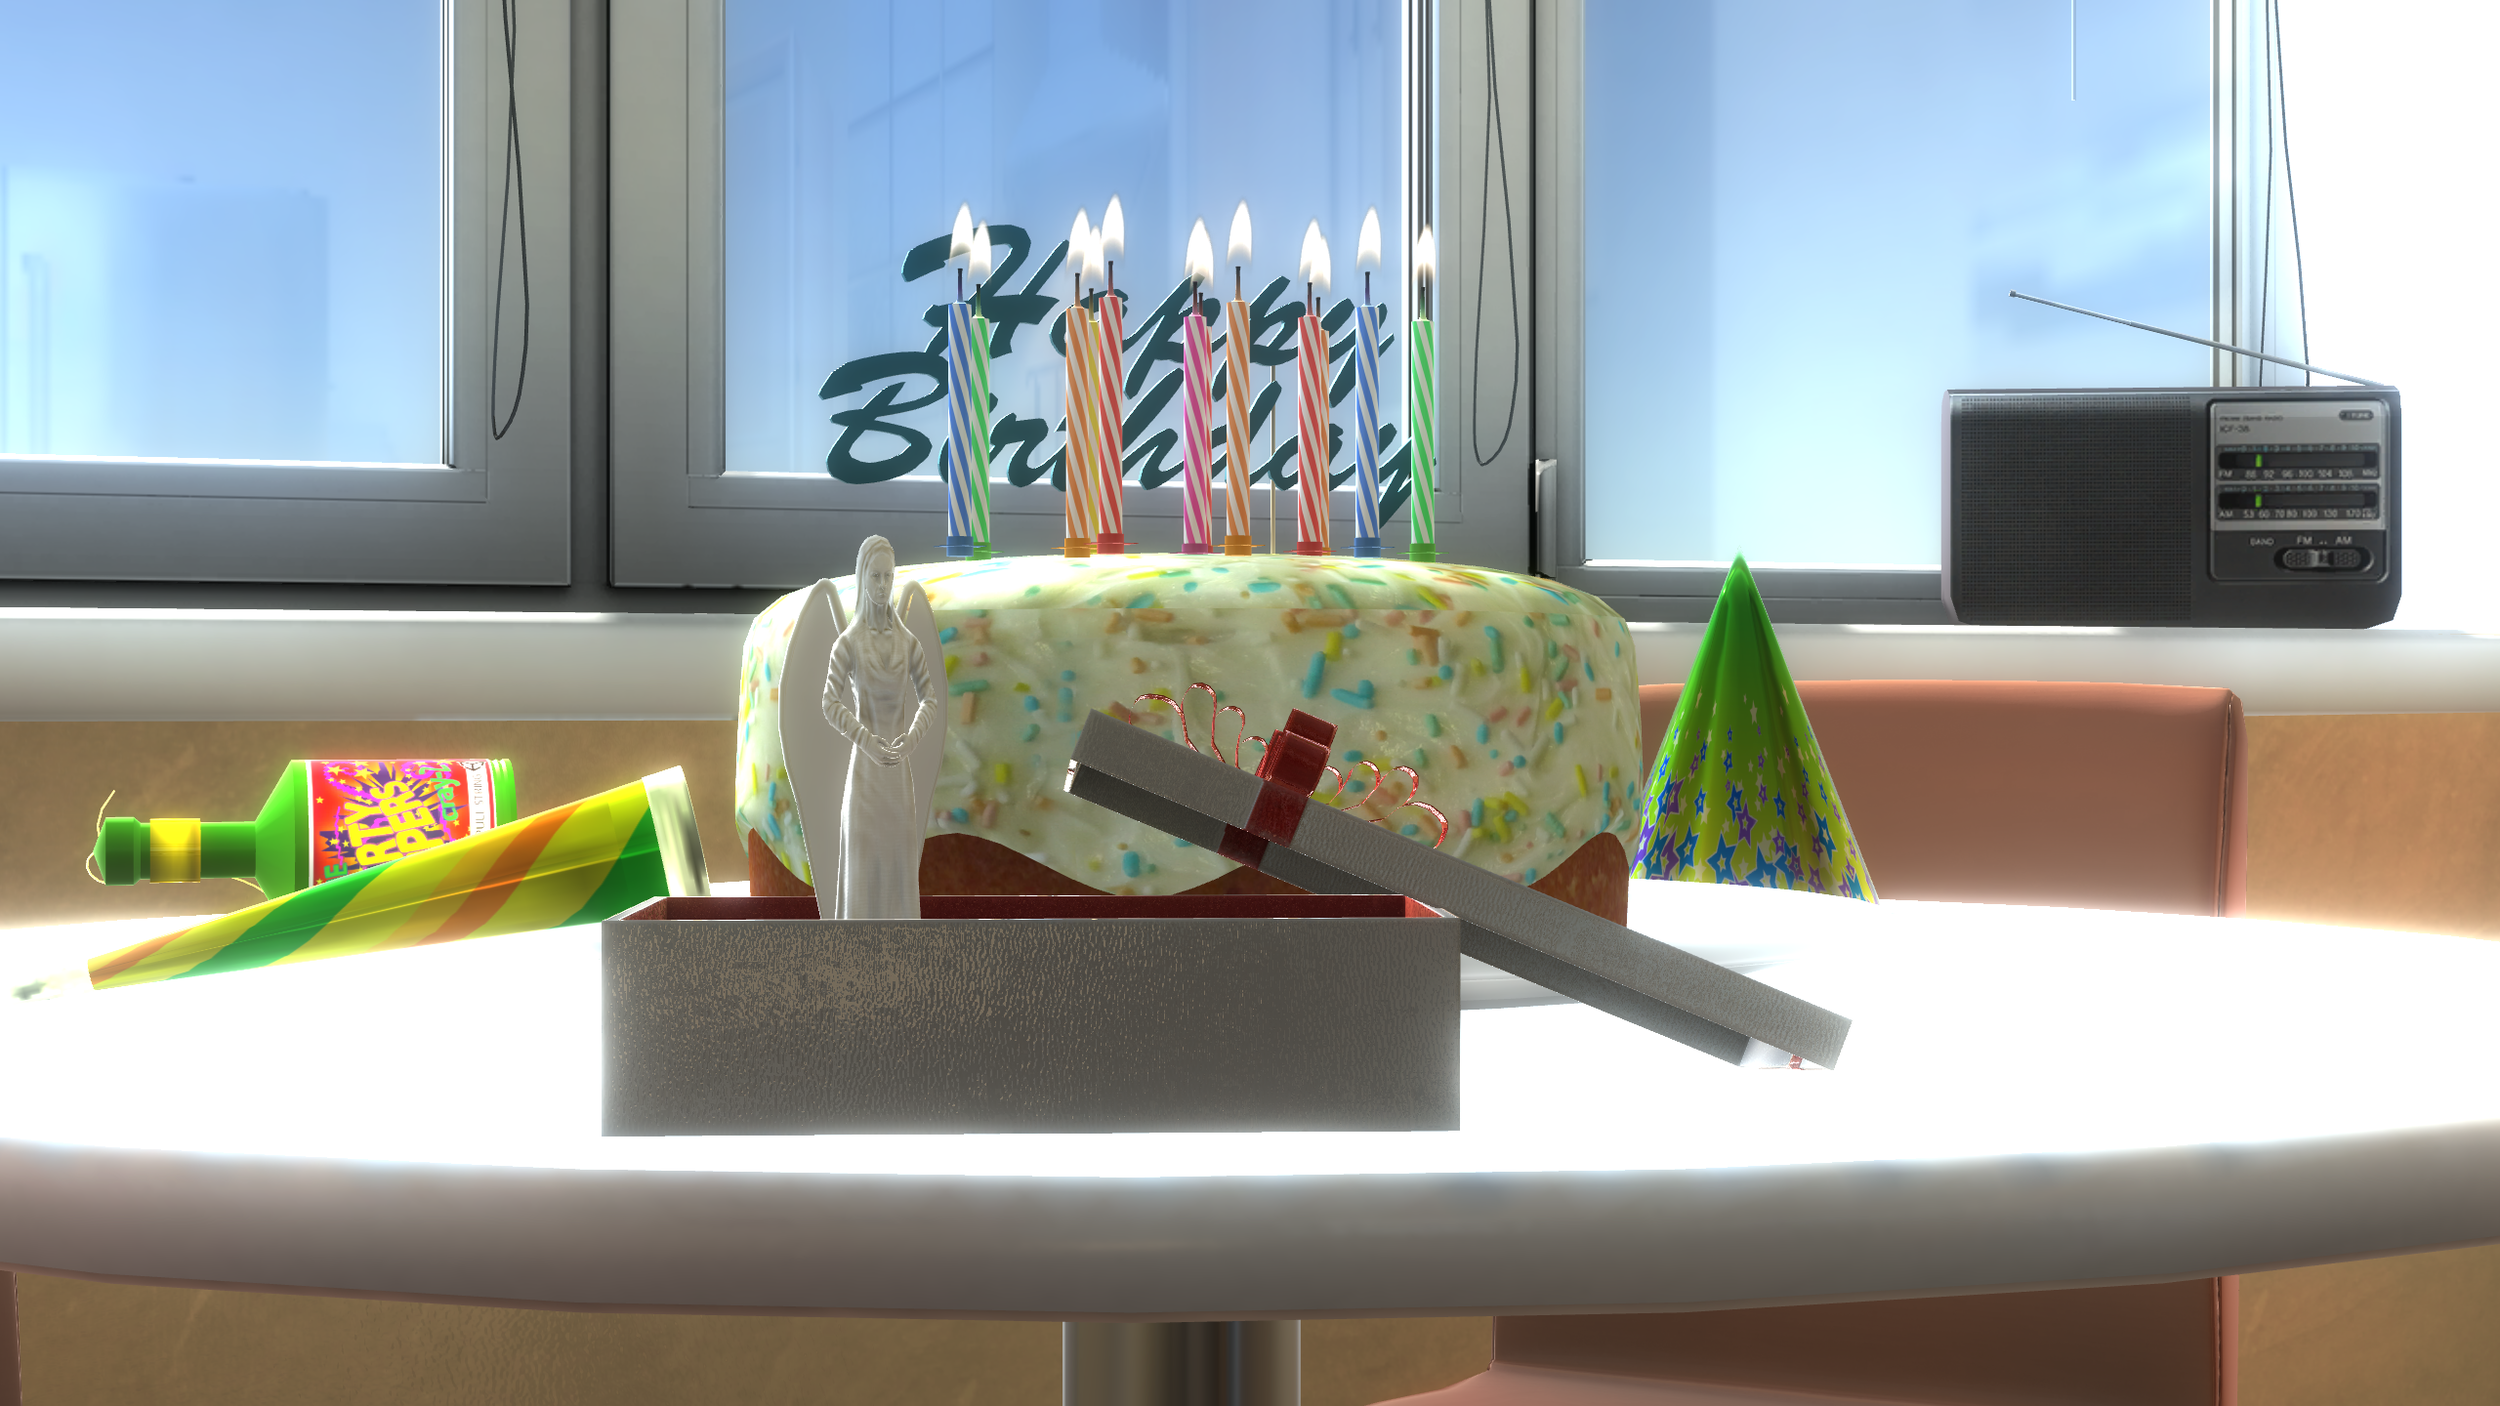
I spent last week working on the Apartment setting for which two particular scenes will take place. The first being Marcus' birthday in the Kitchen area. I found a Unity asset that had some of the features I was looking for, but it was far too modern and upscale for the story, so I essentially re-built it and staged it with a ton of different props. In the end, I think it turned out really well!
The Kitchen scene was one of the environments that my modeler was responsible for building out, however we didn't see eye-to-eye on the level of detail and quality I was looking for. So, unfortunately, we had to part ways. However, I think the setting turned out far better and ultimately feels like a real place.
Bully Street Scene
In this scene there is a small passage of time from Marcus' first day of school. Marcus is walking back to his Grandmother's apartment when he is confronted by a couple of older, neighborhood boys. One of the boys trips him and he hesitates as he gets back up to collect himself.
The feeling I hope to capture is that Marcus doesn't really fit in anywhere. He's different from the kids at the school he's bused to and different form the kids in his own neighborhood. This will ultimately lead Marcus to find solace in his own imagined place of comfort. The place where angels meet.
As with the previous scenes, I provided Jeremy with a set of instructions for the animations. I created the two thugs in Fuse and gave Marcus some pants!


In this case, I didn't create a street scene in Unity, but rather sent Sean a bunch of assets for him to build a setting. However, I had him provide Jeremy with a basic model of the environment. This street scene will also be used later in the story, but as a different location. So I had Sean essentially create two sides of the street. One side being an upscale Santa Monica-like area and the other being an older, rougher street.

Jeremy did his first pass at animating the bully scene yesterday. Although this is a very early animatic, there are a number of issues with the basic movements of the characters and the timing of the scene. Jeremy is still working to make the characters more fluid and natural.
Classroom Scene
The classroom scene is the second in this "first day of school" series and although it is fairly short, I hope to illustrate something both poignant and subtle. Marcus feels out of place because this school and environment is totally foreign to him. Also, he's the only person of color in the room. What I hope to capture is how his confidence is quickly eroded after not being called on by the teacher. Below is the instruction sheet I prepared for Jeremy.

Similar to the bus scene, I pulled everything together in Unity first. I created the teacher and kids (also from the bus scene) in Fuse and placed them where I wanted them to go.

Once I had things where I felt they should be, I packaged the scene up in Unity and sent it over to Sean for a bit of touch up. Mainly, I wanted the class room to feel a little more cluttered and "lived in" so Sean added backpacks, books and stuff around the walls. He also export a very simple model for Jeremy to use in Maya. After all of the issues we had with the Bus scene, I determined that Sean should just create very basic prop environments for Jeremy to work from. As long as the scale and placement of objects was the same, it should be fine for his animations. Here is the setting Jeremy received from Sean.

While working on this scene, I began thinking about the VR viewer and whether or not to keep them stationary. My initial thinking was to keep the viewer stationary in the back of the classroom, but then I wanted the viewer to see the kids faces as well. Below are a few different screengrabs as I tried to figure this out. Ultimately, I think I'm going to have the viewer start at the front of the class and slowly float around to Marcus' side.


A few things I have to clean up are the scaling issues. As you may notice, the backpacks and chairs are a little large for the kids. All of this fine tuning will be done in Unity though.
This particular scene proved to be a little challenging for Jeremy. Initially he had the teacher walking across the room, but the motions were unrealistic. Also, because I wanted to experiment with moving the camera from the front of the class to the side, I had him move the teacher's mouth a bit, but the bone structure in the face is a bit off. Again, this is early animation work (that needs some refinement) but it gives a sense of what we're after with this scene.
This first test has the teacher walking across the classroom. I didn't like the way the teacher moved, so I had Jeremy keep her more stationary. Also, I didn't want he moving too close to the VR viewer.
School Bus Scene
This scene represents the first glimpse into the main character Marcus' life. It's his first day of grammar school and as his guardian angel, you witness some key moments in this young life. What I hope to accomplish in this collection of scenes is a nostalgic view of what it truly is like to be a kid. We often reflect on our childhood with fond memories, but in many cases, being a kid was actually hard.
Putting this first scene together was quite a challenge. Sean models using 3D Studio Max, Jeremy animates in Maya and I pull everything together in Unity. The biggest problem we faced was how to work on the same scene in our respective programs. Ultimately, I was able to give Sean a Unity package which he could open and import into 3DS Max. However, this didn't work for Jeremy and Maya. So, the workaround was to provide Jeremy with very basic environments and I would write out detailed instructions with screenshots from Unity. (see below)

The scene started with me pulling together various assets in Unity, including the School Bus model. I then exported the Unity package for Sean, who modified the scene a bit further. For example, the doors on the bus were closed on the original asset, but he opened them. He also had to create new seats for the interior of the buss so there was more space for the characters to move through.

Unity screengrab with my notes regarding the missing ground materials
One of the biggest issues we've encountered was keeping the assets at their original scale values. It's been hard to transfer characters and props through three different programs and maintain the proper scale. I created a scale reference for Sean, to try to help with this.

Inside Maya Marcus is teeny tiny

The kids imported into Unity as chubby Oompa Loompas!

Another challenge with this scene is determining where to place the VR viewer. Because the viewer is a very tall angelic figure, the bus is fairly tight in terms of the interior. I'm still trying to figure out the best solution, but these are a few tests to determine the viewer height.


After about a week and a half of sending multiple files back-and-forth, I finally determined that Jeremy could just work independently in Maya on the animations and I will import the characters into Unity and place them where they need to go. So far, this seems to be the way forward. Below is an animation test from Jeremy for the Bus scene. It's still very rough, but progress nonetheless.
The School Bus scene is still in active production, but once the animation and models were delivered, I had the guys start working on the Classroom scene.
Baby Animation
The first animation project Jeremy tackled was giving newborn Marcus some movement. In the prologue demo, the baby wasn't animated and it really bothered me. Unfortunately, I didn't have the time to include this for the initial submission deadline, but this is one of the small touches that are in the latest version.

Phase II - Production
Where Angels Meet was awarded funding from the Oculus Launch Pad program!
This means that full production is underway and Where Angels Meet is on the way to becoming a reality. The production team is now comprised of three members: Modeler - Sean Phillips, Animator - Jeremy Freeberg and VR Expert - Micah Jackson.

Oculus Project Blog - Where Angels Meet | Week 12 (8/27 - 9/2)
Personal Observations/Progress
- This week I wanted to tackle the logo design, graphic design and promo art for my project. I knew this would take a while, as this is one of the most important parts of any app. I probably spent two days or more working on various logo and background combos until I finally had about 4 different variants that I liked. However, I couldn't decide which direction I wanted to pursue, so similar to what I've done in the past, I posted my two favorite promos on my facebook wall and asked my friends to vote! This was really helpful and I was actually very surprised with how "one-sided" the response was. In fact, I was leaning in the opposite direction! The two promo variants were logo on a sunset background and logo on a tree lined background -- sunset won by a landslide!


Production Progress
Task: Create Promo Artwork and Graphics
As I mentioned above, I spent a couple of days working on my promo artwork and logo. Overall, I'm satisfied with what I have, but will likely push it a bit further. I now realize that I need to create a hero image/character which is a little tricky at this stage. I don't want to reveal the angels initially but it would make sense to have some representation of them. For now, I'm good with what I have and will think about generating more promo artwork down the road.
Task: Integrate Entitlement Check
The most important thing I had left to do was integrate the required entitlement check into my project. This turned out to be trickier than I expected. In my initial review of the Oculus documentation, the integrate seemed to be straightforward. I assumed that I would simply create a script and add the entitlement initialization line with my app id, however upon a closer review, I realized that the Oculus documentation didn't actually tell you WHAT to do once the entitlement is called. In short, you need to figure out how to handle a legit request versus a bad/false request. Fortunately, I found a good thread on the Oculus developer boards which provided a script template that worked like a charm for me. I made two different builds (one with a bad appID and one with my actual appID) and tested the entitlement function. It worked and I was done!
Task: Upload First Build
After integrating the entitlement check and creating my promo artwork, I finally got around to uploading my first build to the Oculus developer dashboard. The publishing process was fairly straightforward and very similar to the Apple App Store submission process. (I'd guess there are some former Apple employees at Facebook/Oculus which would explain it ;-) I uploaded a build to the Alpha channel and will upload my final build to the BETA channel tonight. Depending on the final submission instructions for the OLP program, I should be done!
Oculus Project Blog - Where Angels Meet | Week 11 (8/20 - 8/26)
Personal Observations/Progress
- I'm Finished!!!!! Well, for the most part. I'm finally done with the content of my demo and I feel very good about it. However, I still have some minor SDK integrations to do and next week, I'll work on my promotional graphics and logos.
- With the big change to Mixamo over this past week, I was really concerned about having access to basic animations and characters, however all was seemingly smooth with the overhaul. I animated and downloaded three new characters this week from the new Mixamo and all went well! There was still a lot of time spent on getting the materials to display properly in Unity (not sure why they didn't fix that) but overall, the workflow was the same. You just can house any models on the site anymore.
Production Progress
Task: Create Start Scene
After playing though a few different Rift experiences, one thing I realized was that my project didn't have a "start" screen. Initially, the titles just started to scroll when the experience began. So, I added a separate start scene that now allows the viewer to initiate the experience with the 'A' button.
Task: Add a Few Background Extras
After I got much of my content and scenes done, one of the things that bothered me was the empty feeling one of my main scenes had. I caught this early on, but I was concerned that adding too many characters in a scene my cause significant performance issues. This was before I created my trigger scripts, which turn characters on/off based on when the camera passes through a trigger zone or not. Once, I had this trigger script in place, I now had the ability to have character appear when they were in the camera view zone and turn off when they aren't. Now, the time consuming work of exporting, modifying and implementing mixamo characters was left. (See note above)
Task: Check and Implement Basic Controls
As mentioned above, I added a Start screen, which meant I needed to implement a control to start the experience. I was initially a little worried about this because I wasn't sure if I needed to import and configure the Oculus SDK into my project. However, the Unity integration is actually SEAMLESS! I just used the basic GetInput (fire1) command and to my surprise, this worked just fine for the Rift Remote, Gamepad Button A and Touch Controller Button A. Given this is a linear experience, this is all the interaction that was needed, so I was done sooner than I thought!
Over the weekend, I will likely add some finishing touches to my end screen and implement a quit to home function. I looked over the Rift Submission Guidelines again (https://developer.oculus.com/distribute/latest/concepts/publish-rift-app-submission/) and will tick off any boxes I may have forgotten.
Oculus Project Blog - Where Angels Meet | Week 10 (8/13 - 8/19)
Personal Observations/Progress
- Had my first in person meet up with LA OLP'ers! Shout out and thanks to Sarah Waintraub for organizing this meeting at Upload LA. Sarah, Jonathan and Cherryl were the first people to see my project! It was great to get their thoughts and feedback. I also really enjoyed checking out their projects and am excited to see how they progress. Very cool stuff.
- Integrating Spacial Audio is tricky! I spent much of Friday trying to figure out how to integrate the OSP Unity plugin. After reading through the documentation and picking apart the sample project, I finally figured out how to get it working in my project. The key thing I learned was is best to create a new, simple, GameObject and use it to house whatever sound effect you want to spacialize. You really need to play with the min/max settings in the Spacial audio script to get the desired effect. In some cases, the sound field was too small or the object was too far away to be heard. I also had to write an audio trigger script to play certain sounds as you approached specific areas.
Production Progress
Ongoing Task: Finalize Scenes and Animation
I spent the early part of this week trying to complete all of the scenes and address any key elements that were unfinished. At this point, my plan is to lock my build where it is and focus solely on audio integration and technical problems. So far, I'm satisfied with what I have, but there is definitely much more to do. Overall, I've ended up with four scenes (not including titles) and the piece is around 10 minutes long. Much of my animation is from Miximo, but I really wish I had an animator to breathe a bit more life into certain scenes and characters. If chosen to move forward, finding an animator will probably be my first task.
Task: Find and Integrate Audio
I spent most of Wednesday and Thursday hunting for royalty free music and sound effects. The sound effects weren't a big deal, as I have an Audioblocks account and found other stuff on Sounddogs. The real challenge has been music. Earlier in the production, I had reached out to a specific artist to inquire about licensing one of his songs. His manager responded fairly quickly and it seemed like there might be positive outcome. However, after several weeks of no response and unreturned emails, I've lost hope in this, thus the hunt was on for royalty free stuff. Thanks to Jonathan and Sarah, I checked out freemusicarchive.com and found a song that seems to work perfectly! However, it's still not the same thing I had in mind. UPDATE! Friday afternoon I got clearance to use my song for the demo submission!

Oculus Project Blog - Where Angels Meet | Week 9 (8/6 - 8/12)
Personal Observations/Progress
- Feelin' the crunch time this week. I worked pretty much around the clock all week to get my final scenes done and in place. Although our deadline may be Sept 10th, I really feel like I need ot be done by the end of next week and have the final weeks for solving issues and putting polish on my submission. I think I will need at least a week to complete the promo images, logos, marketing screens, etc. Unfortunately, I don't think I will have much time to have various people go through the experience and provide feedback. Overall, I feel confident with where I am and what I think I will be able to submit. However, there are a lot of features and elements that I just won't be able to have in place by September.
- I'm starting to stress out about the music situation. Initially I got responses from the artist's management and this week I reached out to the label that the song was released on, and again I got an initial response but radio silence thereafter. At this point, I'm going to have to move forward with using temp score and library music, which really sucks. The song I'm trying to license is such an important part of my piece that I feel it will really suffer without it. Anyway, I gotta keep it movin'!
Production Progress
Task: Integrate the Angels
From my initial sketches, to the concept renders, to the final animated model, I've been waiting roughly 6 weeks for this moment. My modeler/animator finally delivered the Angel for my project and it was perfect timing! However, it took me nearly 2 days to get the shading and materials right and to also get the animation clips broken up in Mecanum. I also had to figure out a system for triggering the appearance of the angels and playing the appropriate animation, which required a lot of thinking and a little programming. However, after all of the tweaking, one of the key components for my experience has been integrated and it really brought things together. If you want to check out the progression of my Angel character, visit this link: https://avcv.biz/wam-concepts

Ongoing Task: Complete All Scenes
So, going into this week, my goal was to build out and finish every scene and include all of the main actors. Although I had completed my main (and largest) scene weeks ago, I still didn't have my "bookends" in place. Well, I finally built my opening credits, starting scene, final scene and linked them up with transitions. Today, the goal is to build the full project out and have my first full viewing!
For my opening and closing scenes, I relied on the Asset Store and found some great core assets. Of course, I still had to spend a lot of time setting them up and making them work the way I wanted them to. However, the scene that took the most time was the opening credits scenario. My idea for the opening credits was fairly simple, however when I started making it, it proved to be really challenging. In the end, I figured how to get it working but it took much longer than I expected!

Oculus Project Blog - Where Angels Meet | Week 8 (7/30 - 8/5)
Personal Observations/Progress
- Attended Siggraph this week and overall really enjoyed it. The last Siggraph I attended was in 1998 I believe. Lots of VR focus this year, as to be expected and given that the crowd wasn't too large, I was able to experience a wide variety of projects and seminars. I'll try to put my notes into some sort of cohesive form and will share them within the OLP Facebook group. Unity had its own theater where they ran different workshops each day. There were even a few familiar faces like Sarah Stumbo who ran a workshop on XR Development in Unity. (BTW XR is just the acronym assigned to AR/VR/MR/ etc. I didn't know this until later ;-)
Some of the cool things I saw and got to experience at Siggraph 2017 include: Controlling object with my mind while in a VR environment, Seeing a Unity pro demo Timeline and Post Processing in the booth for about 15-20 minutes, watching Floyd Norman be interviewed as the featured Keynote guest and seeing all the advancements in computer graphics from realtime rendering to AI driven talk shows.
Production Progress
- Ongoing Task: Camera Movement
Although I was gone much of the week for Siggraph, I still managed to get some time behind the screen in the evenings. I continued working on my camera flythrough and tweaking the motion settings. This has proved to be very time consuming and ultimately I had to change the layout of the setting, in order to remove some of the turns and curves. The challenge I've run into is making the camera turn slowly and smoothly, without the potential for making one nauseous. Also, with the movement too slow, the piece can get boring very quickly. There is a real trick to getting the camera movement just right.
Task: Build Out Scene Transitions and Loading
Initially, I ran into a bit of a challenge in trying to get the scenes to fade out as I loaded the next scene, but ultimately this was resolved with an Asset Store plugin that works beautifully. I am fading out one scene and moving to a 'staging' scene as the next one loads. It took me a little while to get this system set up and working the way I'd intended, but I eventually it worked and it works quite well. Fortunately, this feature only took about a day to resolve and I've been able clear this from the list!
Task: Output First Standalone Build
After the Open Office Hours call on Friday, my goal was to build my project in its current state and see how well it ran and what the file size was. Well, I ran into a bunch of issues. The first time I initiated a build, Unity halted on several errors before any compiling began.

Turns out, there were a few shaders that weren't compatible with 5.6.3 and a few other scripts. Fortunately, I was able to track down the culprits and delete them without any affect on the project. (TIP: If you run into compiler errors, always check for dependencies and references in ALL of your scenes. If none show up, then you should remove the script and see if it solves the error.) Unfortunately, buying plugins on the Unity Asset Store can be a roll-of-the-dice sometimes. Even if something was tested on Unity 5, it doesn't mean it will work with the latest version of Unity. Also, there may be conflicts with other scripts or plugins which may reference code with the same name. (This has happened to me several times.) Anyway, after tracking down the bad code and shaders, my project still wouldn't build! It would get to the end of the compile and Unity would crash. So, I finally did some Google digging on the issue I was experiencing and it turns out that the Oculus Developer plug ins were the problem. (I'm not faulting Oculus here, but pointing out that the version I had was likely an older version or was not installed properly.) After deleting the OVR packages, the project finally compiled and output my first build!
Oculus Project Blog - Where Angels Meet | Week 7 (7/23 - 7/29)
Personal Observations/Progress
- I've been in a good working groove due to pulling out some old CD's and building a nice playlist. Monday was a 90's hip-hop day: Black Moon, Alkholics, Loot Pack, Slum Village and Souls of Mischief. Tuesday turned out to be oldies: Shuggie Otis, Sly and the Family Stone and Parliament/Funkadelic. I think for Wednesday I'll dig back in the crates for 90's R&B stuff ;-) I'm sure my neighbors hate me (or love me)
- Saw 'Valerian' on Wednesday and outside of being mesmerized by all of the CG and imaginative art direction, it was cool to see how VR was used in this fantastic future world. I won't spoil it for others, but there is a really cool section in the beginning where tourist use VR devices to enter another dimension. What's funny is after seeing the film, I read an article that discussed this scene and how it may be possible much sooner than you think. I just thought is was a cool and practical application of "future" VR. Also, the film was a nice creative break.
- Next week is Siggraph 2017! I'm really looking forward to attending this year and I'm glad it's in LA. I haven't attended Siggraph since I graduated from college. Lots of VR stuff in the mix this year as well. I'll take notes and will post any significant findings on the OLP FB page.
Production Progress
Task: Set Up Camera Paths
After getting a few characters in the scene, my next major task consisted of getting my camera rig set up. My project is an "on-rails" type of experience, meaning the camera isn't controlled by the viewer, but the movement path is predefined and the movement speed is set. I know that this combination can make some viewers sick, which is why I wanted to spend an adequate amount of time working on this system.
To date, I have purchased and used three different camera systems and each one has its pros and cons. The first system I used was the free "Camera Path Creator" which was great until I learned that it won't work with the VR camera. I'm now using the most expensive system called "Camera Path Animator" which seems to be worth the $30 pricetag thus far. It allows you to preview the camera position and view in the editor, as you lay out your waypoints. It's a bit tricky to get the camera to point the way you want it to at first, but once I figured out the orientation controls it seems to work well.
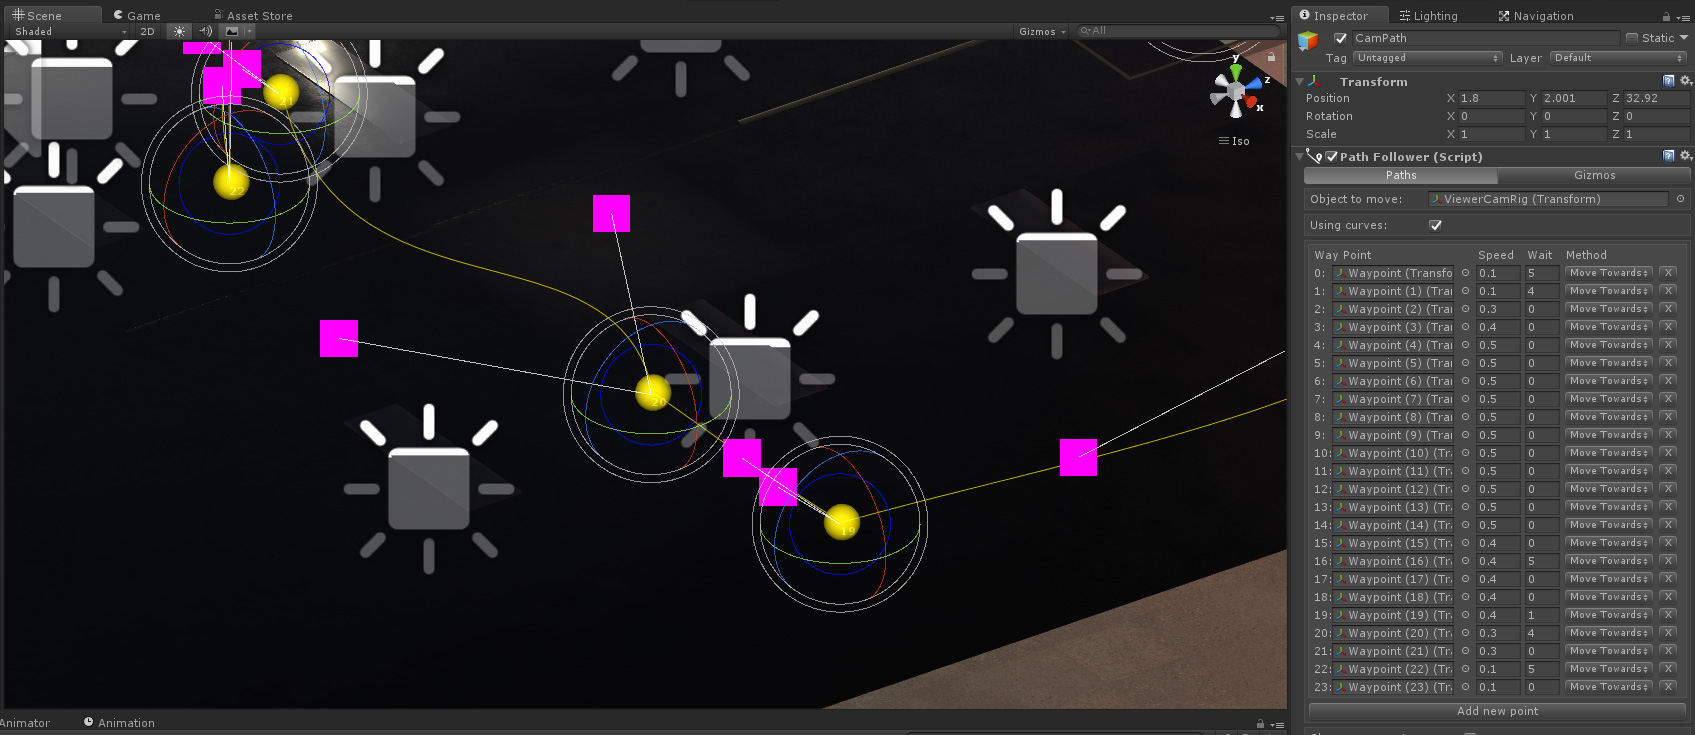
Given that my scene is fairly large and has some turns, the camera movement must be smooth as silk and some of the other systems were just too jerky. Getting the camera movement right is probably the most important aspect of my project and it's definitely taking a lot of time to tweak.
Task: Transitions and Loading
So, after getting my camera paths worked out (still not perfect) I moved on to tackle another key element - scene transitions. When making games in Unity, transitions and loading aren't really much of a consideration because you typically just cut to a 2D screen or billboard as the next scene loads. Obviously you can't cut to a 2D screen in VR so this required a couple hours of consideration. I got my scenes to load on trigger but making a smooth transition is still a bit of a challenge and there aren't many good solutions on the Asset Store. However, I think I have figured out a workaround. I'll spend much of Saturday working on my thesis.
Oculus Project Blog - Where Angels Meet | Week 6 (7/16 - 7/22)
Personal Observations/Progress
- I learned about last Friday's AT&T Shape VR event through the LA "Blacks In Technology" group and attempted to check it out. I use "attempted" because when I got to the Warner Bros. lot, there was a line of people from the gate all the way to Riverside Drive. I thought it was some sort of open cast call until I saw the AT&T signs! I actually found a parking spot on Riverside and walked over to the line. I waited in the sweltering valley heat with over 100 other folks to see what was inside. Honestly, I had no clue what the event was about. I thought it was a small, internal studio VR meeting. Turns out, it was a really large, multi-day event with speakers, seminars, workshops and booths. It was similar to VRLA, but I hadn't heard anything about it. Anyway, after waiting in the sun for 30 mins, I get to the gate only to find out they didn't have my registration info on file. In short, a BIG waste of time, however I will look into this event for next year. One thing was clear, people are still VERY interested in VR. I could not believe the size of the crowd that showed up. As I left the studio and walked back to my car, the line was even longer than it was when I arrived!
- After a few rounds of back-and-forth, my concept artist has finally finished the rendering of my angel character. I really wish I could've worked with him in person, but given the small budget I had to work with, I'm happy with the end result. I've gotten the final render over to the modeler who's in the UK. Hopefully, he can turn it around fairly quickly.

Final Render of Angel Character
Production Progress
Ongoing Task: Complete Scene Setting
I started the week picking up where I left off on the main setting for my experience. I completed the basic structure and then dug deep into the lighting adjustments. I removed all the pre-made reflection maps and lightmaps from the asset bundles and started from scratch. Making Reflection maps for such a large setting is very time consuming, but the results are well worth the efforts. Good reflection maps are one of the tricks to making your environment seem 'real' and not flat or static.
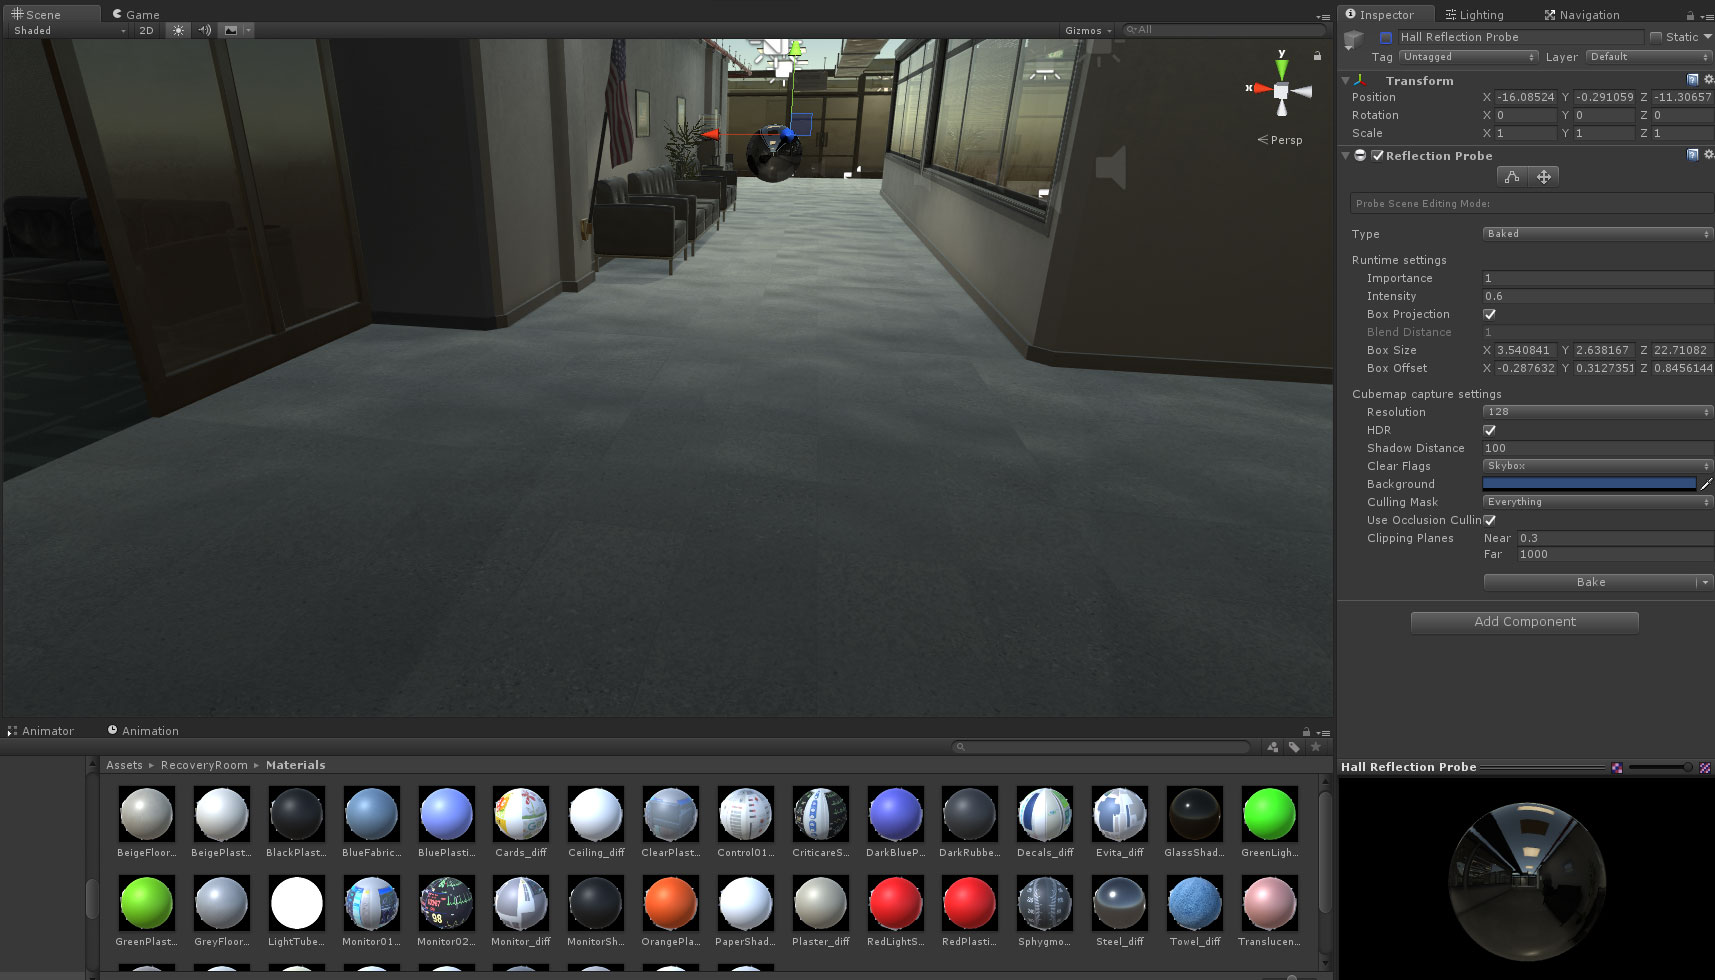
Reflection Map OFF
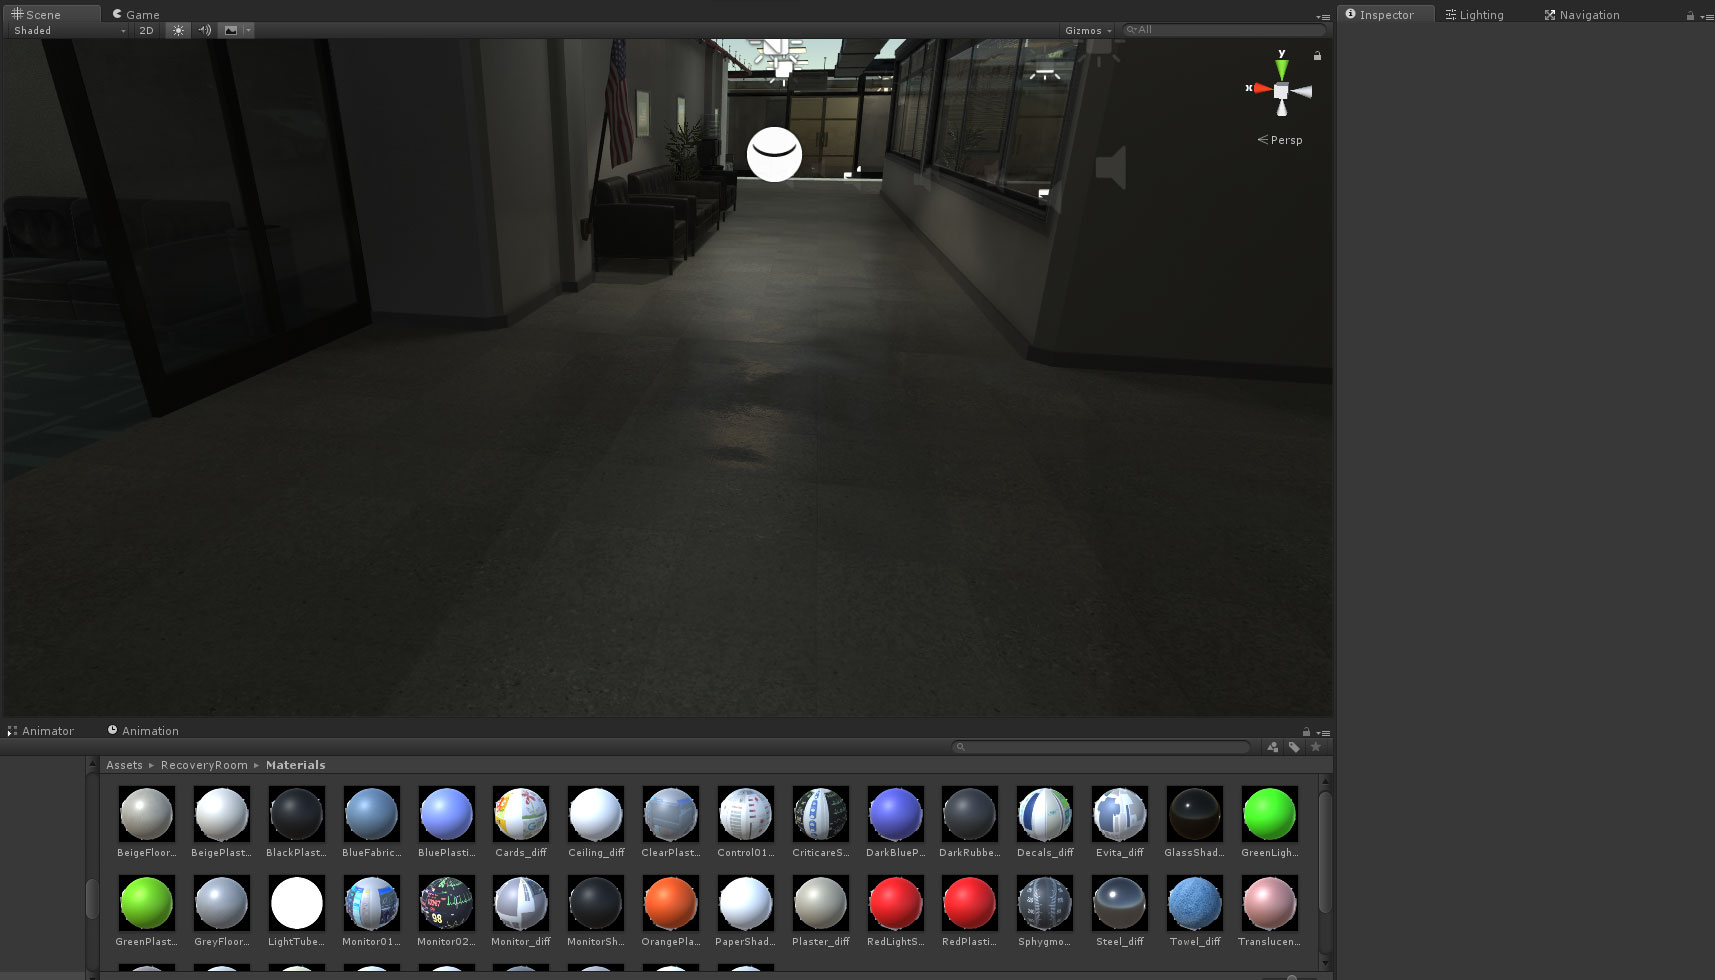
Reflection Map ON
UPDATE: I finally completed the main setting for my project! I probably spent another day or so tweaking the lights and baking reflection and lighting maps. Even with 64GB of ram and a fairly powerful processor, it takes about a half-hour to bake the lightmaps. My advice would be to use "realtime" lights when initially working on your environments and when you have things looking pretty good, change them to "mixed" or "baked" lights.
Task: Make and Add Characters to Scene
Now that my scene was built and ready for primetime, the next step is to add the characters, actors and extras in. I've already made about a half-dozen characters in Fuse, but I realize I'm going to need much more in order to fill out the scene. I'm debating whether or not to use low-poly NPC's in the background and feature the Fuse models in the viewpath. Not only was creating and animating the models in Miximo time consuming, but it took FOREVER to get their textures and materials to look right in Unity. After numerous searches, I ultimately found that Adobe doesn't "officially" support Unity-ready textures. Fuse is optimized for Photoshop and Adobe products, which means you will need to do lots of tweaking in order to get hair and eyelashes to display properly in Unity. So, I spent a couple of days just getting 4 characters integrated into my completed scene. The other thing that sucked was that now that my scene lighting was pre-baked, all of my characters were totally dark. There were hardly any "realtime" lights in the scene to properly light them! In order to solve this problem, I added a directional light which only shines on the characters and a few local spot lights near the characters to light them directly. All of this has taken much longer than I expected, but it's moving in the right direction.

Oculus Project Blog - Where Angels Meet | Week 5 (7/9 - 7/15)
Personal Observations/Progress
- I just found out about WEVR's Transport subscription service for VR content. https://www.transportvr.com/explore - this seems like a promising home for VR experiences.
Production Progress
Ongoing Task: Contractors
My concept artist sent me the first rendering of the angel character, however I'm not 100% happy with the result. The references and sketches I provided hinted at a more abstract interpretation of an Angel. Also, I was expecting to receive illustrations and not a model render, which left me puzzled. Outside of the time constraints of the project, I probably would've extended my search a bit further for a local concept artist. I'll work with him to push the figure a bit further before engaging the modeler.

Concept artist's first pass

My edits to the initial render
Task: Scene 1 Building
I have spent much of this week working on the first and most detailed scene for my project. It is a large structure with multiple rooms, lights, textures, etc. It's been a challenge to essentially build a structure in Unity from purchased assets, but it has been going well. Although this is probably one of the most time consuming parts of the project, I actually enjoy it. This has been one of the largest, single-levels I've ever worked on in Unity. Hopefully, it will run smoothly in the completed demo. So far, it is easily walkable in the Rift tests. I'll likely continue working on this setting next week and hopefully finish by Wednesday.
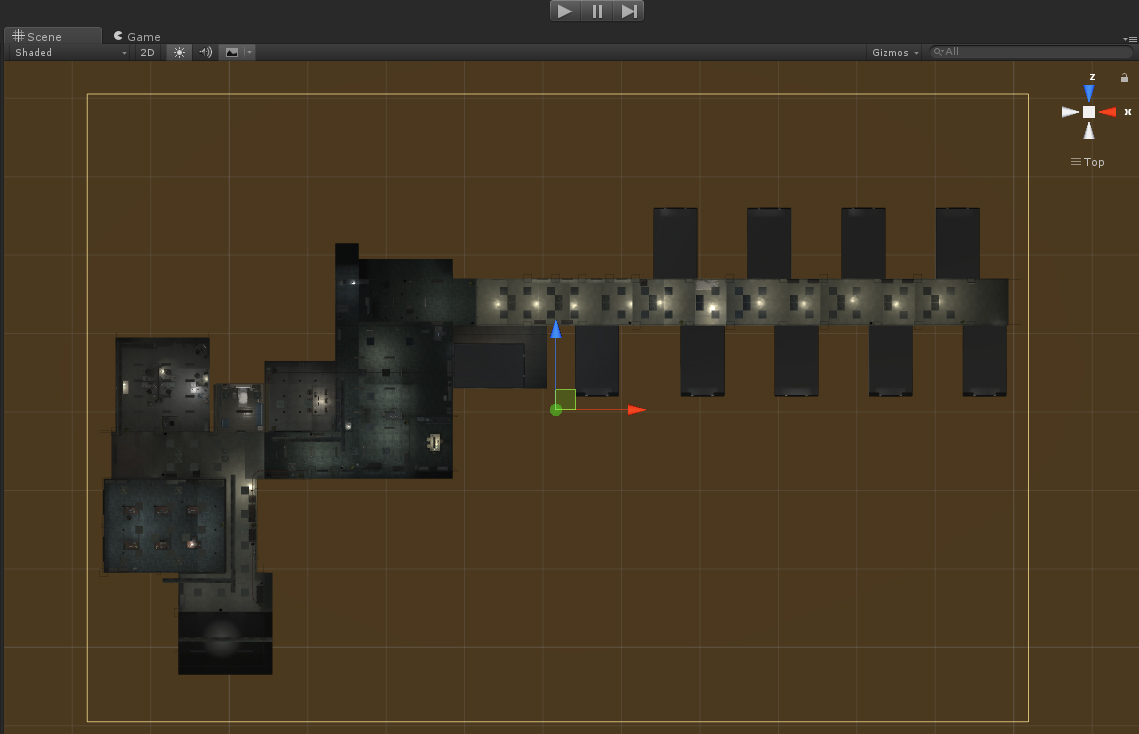
top down view of the hospital scene in Unity
Oculus Project Blog - Where Angels Meet | Week 4 (7/2 - 7/8)
Personal Observations/Progress
- I bit the bullet and bought a higher-end graphics card for my PC. Part of this was based on my desire to see what was possible on the Rift for higher end machines. The other motivation was purely personal satisfaction and a birthday gift to myself! However, playing some of the games and experiences with the higher end card has been eye opening. Although most people may not have the higher end hardware, it is very inspiring to see what's possible with regard to textures, shadows and lighting. The further I go down the Rift rabbit hole, the further away I get from the Gear VR. I'm really drawn by the idea of making my VR experience visually impressive.
- I had a friend try out VR for the first time last night and watched her reactions and wonder with the experience. For the purpose of introducing people to VR, I always use the PSVR and the "Ocean Descent" experience because it doesn't require any interactions and it is really effective at immersing people in an underwater adventure. After that experience, I handed her the motion controllers for another experience and it was interesting to watch how she took to them. She's not a video gamer and it took her a while to just figure out how to hold the various controllers. Afterward, we talked about her experience which was very positive but there were some things she said that were notable. Her initial perception about VR was that it was something for people who play video games. She assumed it was all games and not necessarily something that would interest her. After experiencing it, she said she could see the potential for so many different experiences. Her comments affirmed my thoughts about VR as well. I feel that in order to reach a mass audience, VR has to have many different on-ramps. The VR industry must show the world that it's not just about gaming or fantastic interactive content.
Production Progress
Ongoing Task: Contractors
I have finally secured both a Concept Artist and a Modeler to help me further develop and realize the Angel character I sketched. I'm in the process of drafting agreements for both contractors. The Concept Artist will be working on initial sketches this week and hopefully completing the detail illustrations within a couple of weeks. The Modeler is anxious to get started (which is good) but can't begin until I have a final illustration of the character. The next contract role I need to secure is that of an animator. This role will be key for the project and I may try to tap the OLP group for leads.
Task: Create Characters
It's no secret that Fuse is an amazing tool to create free, Unity-ready models. I spent much of Wednesday creating two main characters and several extras and background characters for my project. My goal is to try to generate as many characters as I can before the Mixamo site change in August.

Task: Begin Scene Construction
This week my focus will be on the creation of the first scene of the experience. I've already started reviewing assets and building of list of elements I'll need. My goal is to have a rough scene mock up by the end of the week.
UPDATE: I spent a full day looking for, filtering through and finally purchasing the key assets for the first scene of my experience. I spent a good part of Thursday and Friday getting everything into Unity and placing them around. The coolest thing about building something for VR is the ability to actually move through the environment as I work on it! Working in Unity with the Rift is an incredible experience, but I wish there was a way to work with the headset on all the time! Perhaps in the future there will be a Unity VR plugin that will allow you to access the tools while standing in the grid. Anyway, I've got the main 'bones' and props of the scene together but now the tedious work of placing everything begins. This will likely take a couple of weeks to complete, light and optimize.

Oculus Project Blog - Where Angels Meet | Week 3 (6/25 - 7/1)
Personal Observations/Progress
- Attended a VRAR Association meeting on Tuesday which was focused on getting funding and investment for VR. There was a panel of reps from various VC firms and capital groups. They shared some insight on what they're looking for in terms of VR investments which is essentially anything that has a long tail. They're not interested in a single project or app, but rather the road map for a long term business. This wasn't anything I hadn't heard before.
- Had lunch with Jonathan from another indie VR studio and we talked about pitching investors, as well as VR content in general. Turns out his group was working on a project which was similar to mine, however they scrapped theirs. This was obviously really intriguing for me but ultimately I understood why they did. He explained that there was an issue with agency for the player/viewer. They were aiming to make their experience interactive, whereas I've decided to make mine non-interactive. We discussed several VR games/experiences including: Chronos, Invasion, Edge of Nowhere and Lost. Ultimately, I think the agency issue is one that needs to be solved long before you begin building anything in Unity or Unreal. I feel that it should start and end with good old fashioned writing. If you are able to set the expectations for the viewer at the start and stick with them, there shouldn't be issues with agency. However, if you grant the viewer some sort of key responsibility, role or position within the experience, you must make sure that it carried through without any soft lines or compromises. The viewer should know who they are and what part they play within the story and that part shouldn't change. It's easier said than done when making an interactive experience, but similar to making a movie, there are certain story structures and rules you typically don't break.
Production Progress
Challenge: Unity Lighting
I posted a link in the facebook group regarding the key changes in Unity's Lighting system from version 5.5 to 5.6. Hopefully people clicked on the link because the changes are significant. I literally spent three days tweaking and re-baking my lighting for the test scene I built. Initially, I couldn't figure out why certain trees within the scene weren't lit and other objects were hella bright! It didn't make any sense! Then I found Kamal Akay's blog post which was a real lifesaver (http://kemalakay.com/?p=540). After reading this blog, I was able to rebuild the lighting in my scene and understand how the new shadow and lightmapping options work. The scene looks MUCH better now and the lighting is actually much better than the previous system. However, Unity doesn't provide a lot of detail about this system. Although I spent three days figuring this out, I now understand how it works and should be much better off in creating the first scene of the demo.

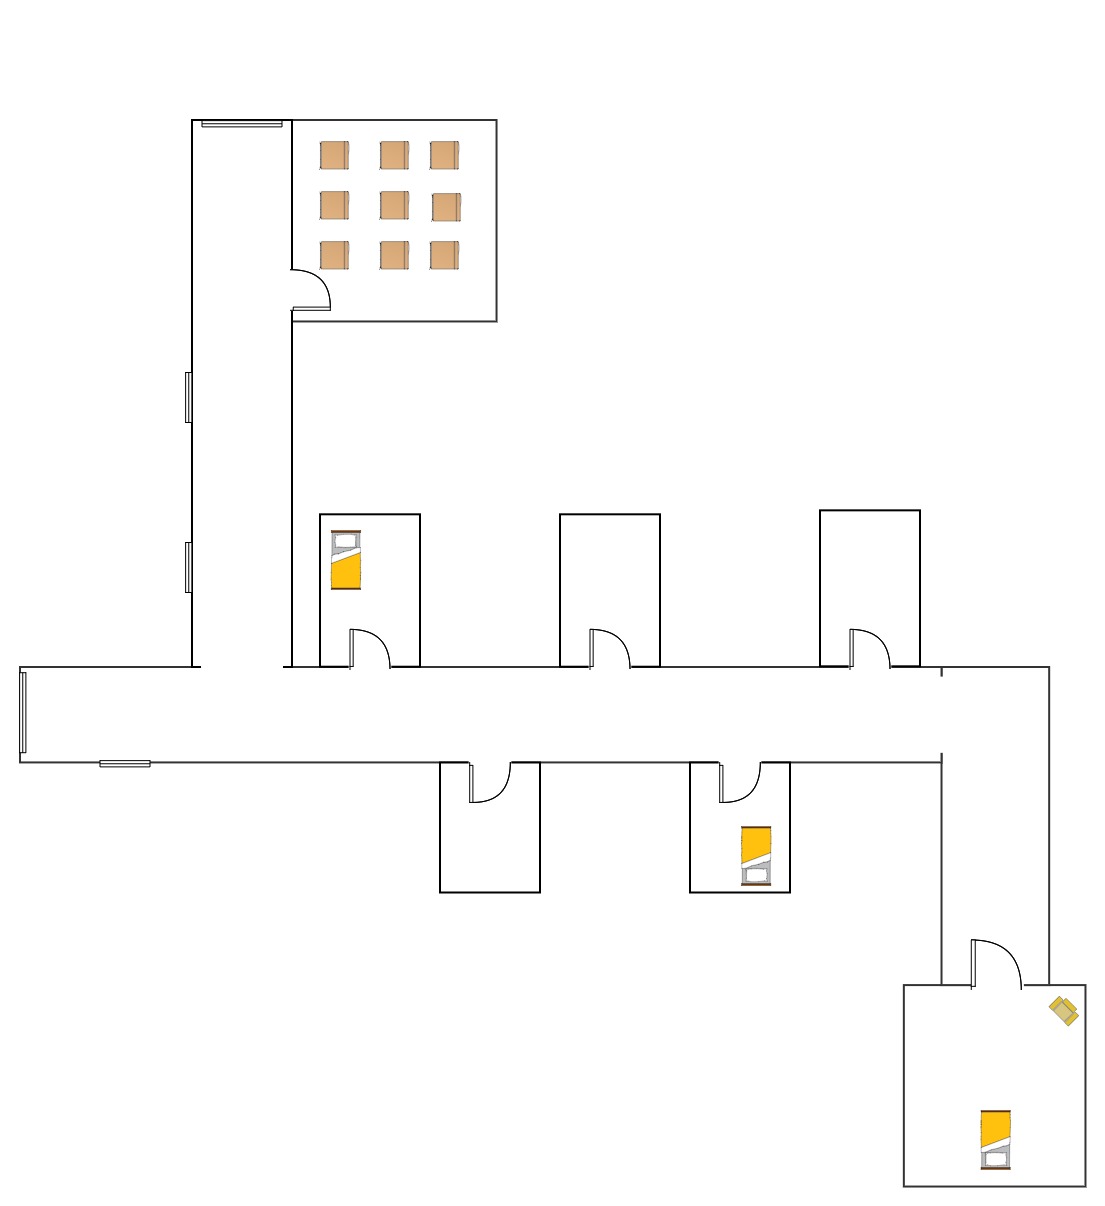
Task: Complete Storyboard/Schematic
Using Gliffy I created a scene blueprint for my first scene. This was helpful in determining the physical size of the environment, but it also forced me to think about how I want the viewer to maneuver through the experience. Initially, I had drawn up a fairly simple room and hallway setup, but I ended up adding an additional hallway and turns in order to make the environment a little more interesting. It's always easier to move around boxes on a grid than figuring this out in Unity! The next step is to do similar schematics for the other scenes.
Oculus Project Blog - Where Angels Meet | Week 2 (6/18 - 6/24)
Personal Observations/Progress
- Unable to log into the Launchpad forum. When I attempt to go to the thread I get a permission denial page: https://forums.oculus.com/developer/categories/launch-pad-2017
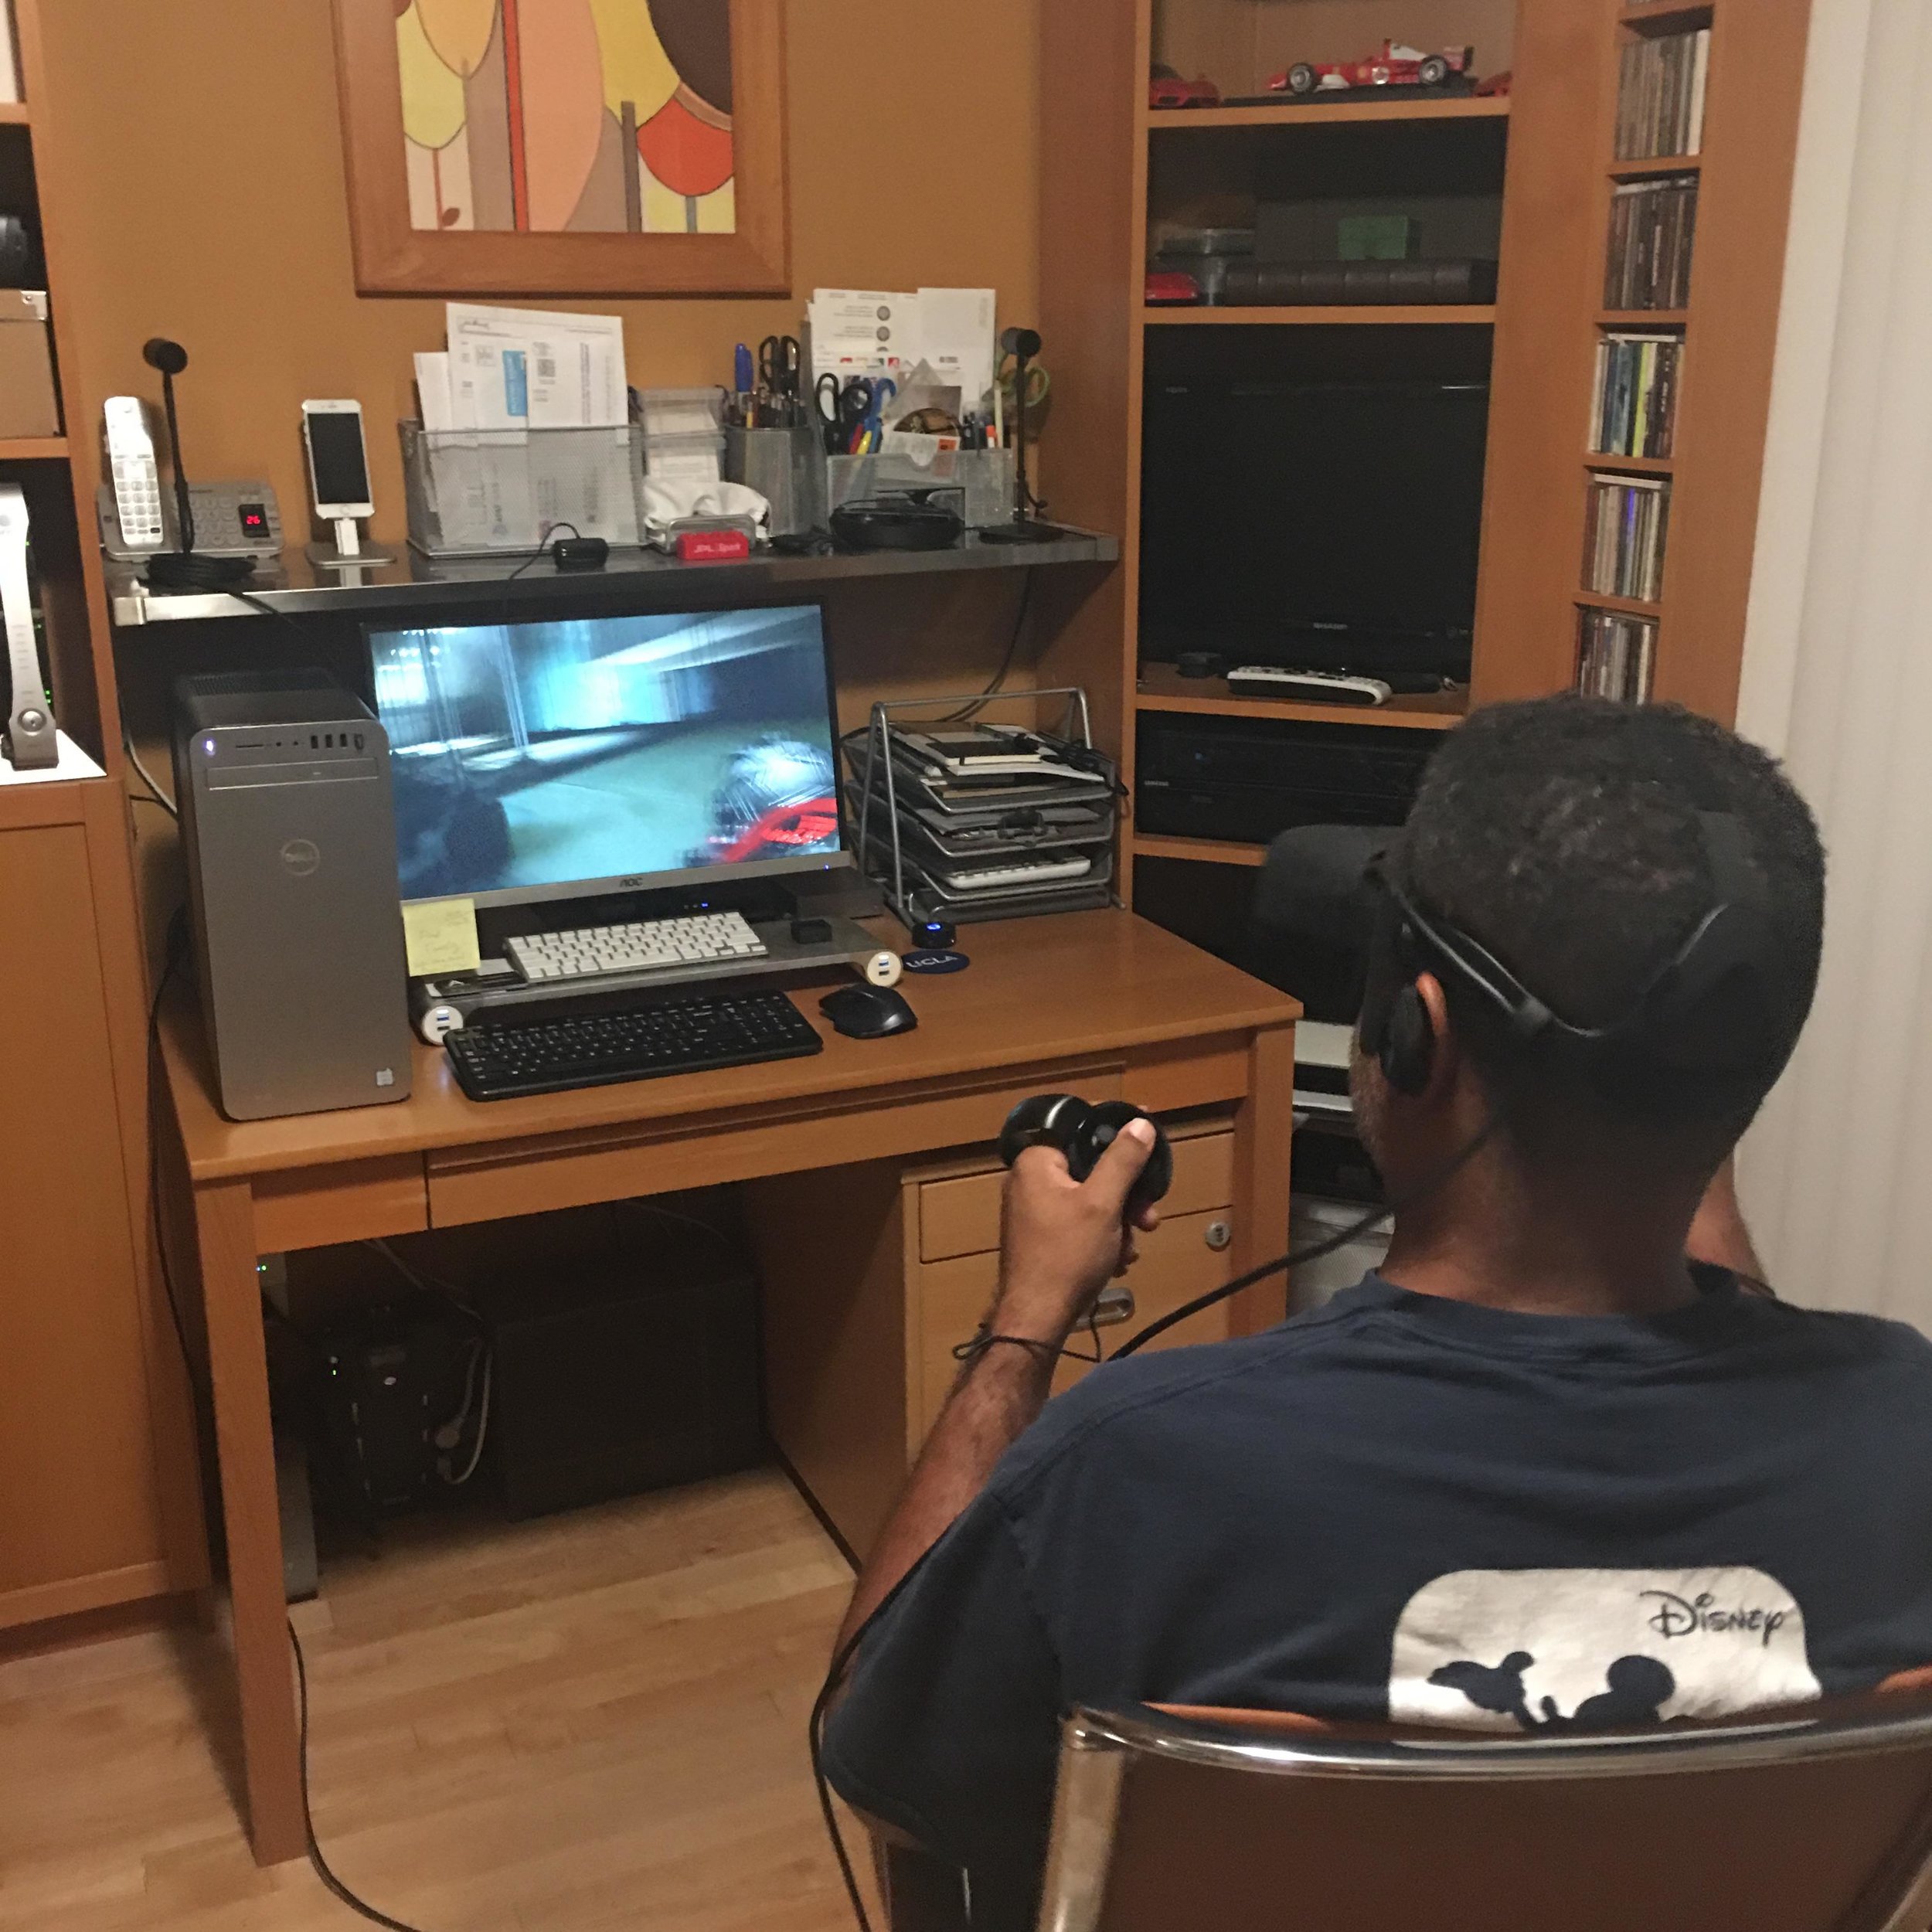
- After getting and setting up the Rift, I've become really partial to it now. I'd love to build my project for the Rift ultimately, as I see it would allow me to take advantage of the proper lighting, textures and shaders to create the world I'm envisioning. Perhaps I'll start with the Rift to generate my tests and work to lower the graphics bar for the Gear VR. It's much easier to view and output on the Rift, given it's hooked directly to my PC.
- Researched various sources for funding including banks, VC's and seed round investors. Planning to attend a VR/AR funding workshop at Fox on Tuesday.
Production Progress
Task 1: Creation of the Angel Models
Reached out to various modelers and artists on Sketchfab and ArtStation for concept artwork and modeling collaboration. Got a few initial responses, but most of them were busy and not taking on new projects. Will extend my search a bit further and eventually post as a task on Unity Connect.
Task: Complete an initial VR test project (Unity or Oculus)
On Tuesday I did my first VR test in Unity which was AMAZING! I took elements from a previous project and cobbled together a test environment which seemed to work very well. I spent the rest of the week making adjustments, optimizations and tweaks to the scene. A few initial learnings:
- The camera (if not using OVR cam) must be attached to a parent GameObject or it won't render to the Rift. After reading a few posts, I learned that the Rift must have full control of the camera with every frame, which makes sense. However, the camera Path system I was using was now useless, but I found another solution for smoothly moving the camera through my scene.
- Lighting is REALLY different in VR from how it's represented on the monitor. I'll need to see if there is a plugin that replicates the VR view on screen, so I don't have to keep jumping back-and-forth from goggles to Unity editor. In general, things were much darker and higher in contrast. After tweaking for a few hours, I think I've figured out a relational handicap. In Unity, the scene should be a little more "washedout" in terms of color and light, which ends up looking okay in VR.
- Wind and particle effects seem to work smoothly with no framerate drops. I haven't collected and compared any data yet, but I was surprised that the scene ran relatively smoothly.
- Camera height is very tricky, especially if the camera is on a path system. Without a character controller type setup, I had to just guestimate the proper height for the camera, which took a few iterations, but ultimately I figured it out.
Overall, I was very pleased with my initial VR test on the rift. I'll continue to shape this test environment until it resembles the "non-VR" concept I had. There is a lot of scale and positioning work to do within the scene, so that things have the proper proportions. It's been fun though!